Pages

Tuesday, December 22, 2015

Local Food for the Holidays

If you still have some last minute shopping to do, consider stopping at Three Rivers Market on Central Street. Thanks to their support of local growers, there is an abundant selection of produce, meats and baked goods grown and made by our neighbors in the Tennessee Valley Region. Here are just a few of the items available:

Eggs
If you have not tried a genuine free range farm egg, you are missing out. The market stocks eggs from several local farms. My personal choice is eggs from Circle V Farm in Hancock County. I like them because the carton is stamped with a "sell by" date that is 30 days from the date the eggs were harvested. As a result, you know exactly how old the eggs are. Circle V also packs duck eggs. They are highly valued for baking, as the amount of yolk is greater than a hen's egg of the same size, and they taste absolutely delicious prepared any way you like hen eggs.

Miso
Believe it or not, you can buy organic miso made locally. Check the cold case for the different varieties by "Miso Master." Miso is fermented from soybeans and has a delicious, almost meaty, flavor.

Cheese
Three Rivers Market probably has the best selection of local and regional cheeses around. Check out "Shakerag Blue" from Sequatchie Cove Creamery, or sample one of the exceptional offerings from the legendary Blackberry Farm in Walland. Sweetwater Valley produces some fine cheddars and flavored cheddars, and you will be hard pressed to find a better Gouda than the one from Kenny's Farmhouse in Kentucky.

Meat Products
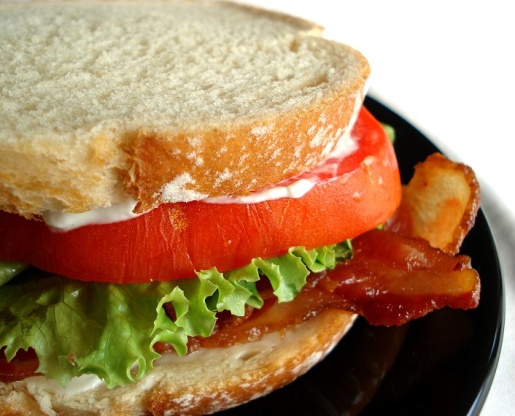
In addition the the best bacon and country ham in the world from Benton's of Madisonville, you will find sausages and pork from JEM Farms and West Wind Farms, and fresh beef from Strong Stock Farms and Mitchell Farms. The latter two are both located in east Knox County. Circle V Farms produces the ground turkey I noticed today, and you can get farm raised trout from across the mountains in North Carolina.

Vegetables
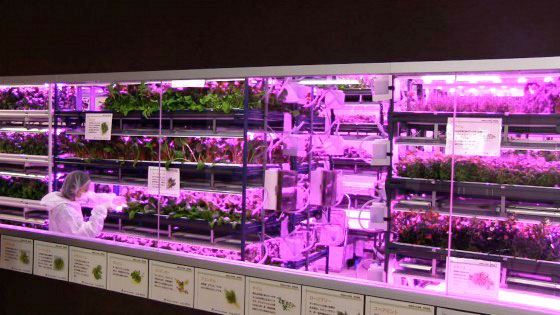
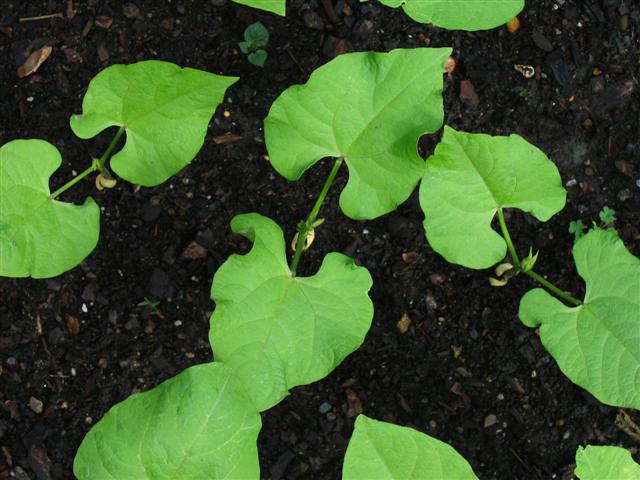
The abundance and quality of cool season vegetables now available, most from Grainger and Loudon Counties, is remarkable. I cannot recall seeing bak choy, beets, kale (several kinds), collards, and turnips of such fine quality anywhere else in the area.

Cornmeal is not, strictly speaking, a vegetable, but I could not fail to mention the stone ground cornmeal from Grainger County. Made from the heirloom Tennessee Red Cob dent corn, it will make a pan of cornbread so good you won't believe it. Best of all, it is found in the bulk section, so you only have to purchase the amount you need.

Baked Goods
Magpies, Flour Head, Tellico Grains, and several others have outdone themselves with holiday treats and breads. The big problem for shoppers will be resisting the temptation to try one of every kind of the cookies, cake and other sweets on offer. Flour Head, a sister company of the Tomato Head restaurant, makes excellent sandwich breads and buns, and for a true artisanal sourdough you can't beat Tellico Grains, with their brick oven.

Brewskies
Dozens of craft brews are available, many produced within a couple of hundred miles of Knoxville. My personal favorite is "Loose Caboose Lager" from Depot Street Brewing in Jonesboro, but there are numerous others to try. So much to do...

Non-Food Items
You can also find a great selection of books on cooking, food gardening and related topics, including one of mine, The New American Homestead. I am hoping that Santa will leave a copy of Sean Brock's Heritage under the tree this year. Brock is the executive chef of McCrady's in Charleston, SC, and Husk, with locations in Charleston and Nashville. He is well on his way to becoming one of America's foremost chefs who specializes in the traditions of Southern cooking. Like many other great chefs, he was in the kitchen at Blackberry Farm for a while.

Whether you are looking for a special treat for the holiday table, or just want to support local businesses, check out Three Rivers Market.

Tuesday, December 15, 2015

Recipes for Holiday Treats

This is the time of year for parties and party food, so we are sharing some recipes we discovered or invented recently. All are easy, quick, and can be done ahead of time, a big plus when you are throwing a party.

Pimento Cheese Empanadas

You can always substitute store bought pimento cheese to save even more time. Choose one that does not have too much mayonnaise, and a chunky consistency for best results.

6 empanadas

1 refrigerated pastry crust
6 tablespoons pimento cheese, preferably homemade

Preheat the oven to 375 degrees. Unroll the pastry crust on a work surface and cut four inch circles from it. I used a Ziploc screw top storage container and it worked perfectly. You should be able to get four circles from the crust. Then combine the scraps, roll out, and cut another circle. Finally, form the remaining scraps into a sixth circle.

Fill each pastry circle with about a tablespoon of pimento cheese, then fold over like a fried pie. Crimp the edges and place the empanadas on a parchment lined baking sheet. Or store them in a covered container in the refrigerator, separating layers with waxed paper, if necessary. Bring to room temperature before baking.

Bake until golden brown, about 20 minutes. Serve hot or at room temperature.

Pomegranate Salsa

This is your basic salsa with a couple of additions that take it over the top. Serve with chips, or as an accompaniment to roasted meat or vegetables.

About 1 1/2 cups

1 pomegranate
1 medium tomato
1 medium jalapeno pepper
1/3 cup chopped red onion
1/3 cup chopped cilantro
1/4 cup chopped parsley
1 tablespoon chopped fresh mint leaves
juice of 1/2 a medium lime
salt, pepper and hot sauce

Working over a bowl to catch the juice, cut the pomegranate in half crosswise. Holding one half cut side down over the bowl, rap it all over the surface with the back of a soup spoon to dislodge the seeds. Repeat with the remaining half. Carefully remove and discard any white pith that has been loosened along with the seeds.

Core and chop the tomato and add it to the bowl. Stem, seed and chop the jalapeno and add it to the bowl, along with the next five ingredients. Taste carefully and add salt, pepper and hot sauce to your preference.

The salsa will keep a week in the refrigerator if stored in a covered container.

 All American Munch Mix

This irresistible mixture of nuts and fruit contains only ingredients that Native Americans might have eaten centuries ago. If you don't mind the cost, you can substitute black walnuts or hickory nuts for some of the other nuts. This mix has a lot of calories, but contains none of the processed ingredients found in traditional cereal-based holiday snack mix. Feel free to add more chili powder or to substitute a hotter chili, such as cayenne.

Makes about 4 cups

2 ounces raw hazelnuts 
2 ounces  raw wild pecans (or substitute Georgia pecans)
2 ounces  raw pepitas
2 ounces  raw sunflower kernels
1 tablespoon sunflower oil
1 teaspoon honey or agave nectar
½ teaspoon coarse sea salt
¼ teaspoon ancho chili powder
1 ½ ounces dried cranberries

Preheat the oven to 300°F. Combine the nuts and seeds in a large bowl. In a small microwavable bowl combine the oil, honey, salt and chili powder. Microwave until the liquids are combined, about 30 seconds. Drizzle the liquid over the nut mixture, tossing to coat well. Transfer the mixture to a parchment lined baking sheet, spreading it out into a thin layer. Bake for 45 minutes, stirring every 15 minutes, or until the pepitas begin to brown. Cool slightly, then mix with the cranberries. Cool to room temperature before storing in an airtight container.

Brie with Sun Dried Tomato Topping

This recipe is a modification of one I found in a food magazine eons ago. After I first offered it to guests, it became a regular on our party buffet, owing to the high praise it received.

Enough for 1 large wedge of Brie

6 cloves garlic, peeled
½ cup loosely packed parsley leaves
4 oil-packed sun dried tomatoes, drained, reserving the oil
6 fresh large basil leaves
2 tablespoons grated Parmesan cheese
1 tablespoon oil from tomatoes
1 large wedge of Brie, top rind removed

Using a food processor, drop the garlic through the feed tube with the motor running to mince it finely. Turn off the machine, add the parsley, and pulse to mince. Add the tomatoes and basil and pulse to chop and combine all ingredients. Add the Parmesan and reserved oil and pulse to combine. Spread on top of brie and refrigerate at least three hours before serving with crackers. Garnish with a tomato rose and a sprig or two of parsley.

To make a tomato rose, peel a medium tomato using a serrated knife, keeping the peeling in a single unbroken strip. Roll the strip of peeling, cut side out, into a tight disc resembling a rose. Secure the rose with a toothpick. Use the rest of the tomato for another dish. 

Bon appetit and Happy Holidays to all!


Wednesday, December 9, 2015

More Thoughts on Indoor Vegetable Gardening

We have made a commitment to grow as many vegetables and herbs as possible indoors this winter, within the limitations of our equipment and space. We are using a 250-watt metal halide fixture, which adequately illuminates about 25 square feet of growing space. In this area we have the following:

2 Tiny Tim tomato plants, each in a 12-inch pot
6 Half Pint pea plants, in two 6-inch pots
8 Fantastic Filet bean plants, in a 30-inch planter
2 Bush Spicy Globe basil plants, each in a 6-inch pot
Arugula, 6-inch pot
Upland Cress, 6-inch pot
Scallions, 6-inch pot
Corn Salad, 6-inch pot
Cilantro, two 4-inch pots

All these plants are thriving with this amount of light. At present TVA electric rates, the lighting system costs about 30 cents a day to operate.

Commercial-scale indoor growing space
We have learned that surrounding the growing area with reflective surfaces, in our case some old wall mirrors, keeps the plants from leaning and causes them to grow much more uniformly.

The biggest problem we have uncovered with our indoor garden is the lack of modular growing containers. We are using an assortment of containers we happened to have on hand. If we used only square or rectangular containers, we could make more efficient use of the limited space. Check out the commercial system in the image, and you can see how the right equipment can improve efficiency.

It is important to give each crop its own container. While container gardens planted with multiple crops may look attractive, the different maturity times and growth requirements can result in inefficient space utilization. We have also found that the differing heights of mature plants means you have to be able to adjust the elevation of the pots. Tomatoes that start out only 6 inches beneath the lights when they are seedlings will need to be lowered as they grow into three or four foot tall mature plants. In our experience, really compact tomato varieties do not produce very tasty tomatoes. That's why we chose Tiny Tim, a small, but not tiny, variety, that produces 2-inch diameter fruits.

Select crops for the indoor garden with an eye toward getting the most savings in groceries. In winter, fresh herbs, tomatoes and leafy greens all command high prices at the market, and often the quality is poor. All these crops are relatively easy to grow indoors, if you select appropriate cultivars.

Thursday, December 3, 2015

Garden in the Garage

If you have a spare room, garage, or other heated space, you can produce a lot of food this winter by gardening under lights. We have grown lettuce and other green crops for many years now, using only some cheap fluorescent shop lights from the big-box store. Recently, we experimented with LED lighting, and this winter we are growing under metal halide (MH) in the garage. Each of these lighting systems has its advantages and disadvantages, and we have had some success with all of them. Nevertheless, my conclusion is that MH lighting is far preferable, so long as you have a dedicated space for the light garden.

A dedicated space is important because MH lighting generates a lot of heat, and is not suitable for use around children or boisterous pets. If you enclose the lamp, you have to have forced air ventilation to avoid overheating and a possible fire hazard. Open fixtures are the easiest to use, but obviously are also the most hazardous. It costs about 30 cents per day to operate the unit we are using.

Fluorescent lighting has been great for finishing lettuce, allowing us to start more seeds under the MH system. The MH unit effectively illuminates about 25 square feet of growing space, which, by the way, is more than the standard recommendation for a "square foot garden." Two four-foot shop lights will illuminate about 8 square feet, but the lights must be close to the plants to be effective. That limits the crops to smaller varieties, such as lettuce or arugula. Taller plants, such as tomatoes or peppers, simply cannot be illuminated effectively using only fluorescent lighting.

LED units have numerous advantages. They are bright, safe, and cheap to operate. But they come with a high initial price tag, which is why they are not yet widely popular for home use. Professional growers, however, are relying on them more and more.

Boy howdy, does the metal halide unit grow the veggies! We have been harvesting lettuce and will soon have peas, arugula, scallions, beans and corn salad. We have the first tiny green tomatoes, and expect ripe ones in time for Christmas dinner. All the plants are growing in standard nursery containers using Bonnie Growing Mix. We fertilize weekly with Miracle Gro, diluted according to the label directions. We water every other day, although daily watering may be necessary when the humidity dips this winter.

Indoor light gardening equipment is widely available. There is a local retail store, and of course many online vendors. For gardeners with a suitable indoor space, you can continue to enjoy fresh, wholesome home grown food all winter, by growing under lights. We are experimenting with different vegetable varieties, fertilizers and techniques and will continue to report on our findings throughout the winter months.

Friday, November 27, 2015

Thanksgiving Dinner Afterthoughts

The big news in the indoor garden right now is the success of our saffron crocus. These bulbs are normally planted in spring and bloom in early fall. I purchased the bulbs at Stanley's Greenhouse in late October, and they were already beginning to show signs of sprouting. I took a chance and planted them in a pot that I moved into the garage when frost was predicted. I was rewarded with a bloom on Thanksgiving Day. Its three anthers provided a tiny pinch of the world's most valuable spice. I am encouraged, and will be growing more of these beautiful bulbs next year. They should go dormant in a couple of months, and I can move them outside next April. After a season of growth outdoors, they should bloom beautifully next October. Most people don't think of saffron as a backyard crop, but it is actually no more difficult to grow than our familiar spring-blooming crocuses.

Prior to Thanksgiving we are bombarded with recipes for all the traditional goodies. This year, I decided to save the recipe advice for after the holiday, because I wanted to try some new recipes and report on them. Our favorites were new takes on traditional dishes: dressing and green bean casserole. You can enjoy these for Christmas, or anytime.

Stuffins
(6 muffins)
                Among food lovers, there are two schools of thought about Thanksgiving dinner. One school holds that the turkey must contain stuffing, and the steamed savory bread pudding that results is always known as “stuffing.” Down South, however, the same savory pudding is cooked in a separate pan and is called “dressing.” Even though the available shortcuts are usually identified as “stuffing” mix, they perform equally well as “dressing,” hence, my use of “dressing” here. I created this recipe primarily because a whole bag of dressing mix makes too much for just the two of us.  After I made it, however, I realized the method results in lots of crunchy crust and a moist but firm center, exactly what I am looking for in Thanksgiving dressing. You can use this method with any dressing recipe, adjusting the quantities so you have about three cups of uncooked dressing. Or, if you are expecting a crowd, the recipe can be easily multiplied.

2 cups Pepperidge Farm Herb Seasoned dressing mix
½ cup chopped onion
½ cup chopped celery
½ teaspoon rubbed dried sage leaves
¼ teaspoon kosher salt
¼ teaspoon freshly ground black pepper
1 egg
1 cup chicken broth, preferably homemade

                Preheat the oven to 350 degrees. Oil a 6-muffin tin. (Each muffin cup should hold about ½ cup.)  Combine the dry ingredients in a mixing bowl. Stir to mix well. In a separate small bowl beat the egg with the stock until well mixed, then add to the dry ingredients. Stir until all of the liquid has been absorbed and the dressing is evenly moistened. Spoon the dressing into the prepared tin, dividing it equally. Take care not to “pack” the cups, as the stuffins will not be fluffy. Place in the oven and bake until the top is lightly browned, about 30 minutes. Serve hot.

Green Bean Casserole in a Vidalia Onion
(2 servings)
                The method for the onions comes from the late master chef, Charlie Trotter, in his cookbook “Vegetables.” The rest is the standard casserole, made better with home cooked goodness. Using the canned fried onions maintains the connection to the original dish.

2 whole Vidalia onions, approximately the same size
6 ounces white button mushrooms, chopped
3 tablespoons minced onion
2 tablespoons unsalted butter
2 tablespoons all-purpose flour
1 ¼ cups milk, divided
½ cup canned green beans, drained
¼ teaspoon dried thyme leaves
Salt and freshly ground black pepper
Canned fried onions, to garnish

Prepare the Vidalia onions. Preheat the oven to 375°F. Trim the root end of the onions so they will sit upright. Carefully remove the onion skin. Set the onions in a baking dish and add cold water sufficient to cover them halfway. Set the dish in the middle of the oven and bake for 1½ hours. Using tongs, carefully turn the onions upside-down and continue cooking another 1½ hours. Remove the dish from the oven. Using tongs, transfer the onions to a wire rack to cool completely. When the onions are cool, remove any blackened outer skin. Using a spoon, remove some of the onion flesh, leaving a cavity surrounded by two or three layers of onion. Refrigerate the onion flesh and use it for another purpose. Set the prepared onions aside while you complete the dish.

Place the mushrooms, minced onions and butter in a medium saucepan. Set the pan over low heat and warm it until the onions begin to sizzle. Reduce the heat, cover the pan, and cook on low for 5 minutes. Uncover the pan, add the flour, increase the heat and cook, stirring, until the fat is incorporated into the flour, about 2 minutes. Pour in one cup of the milk and cook, stirring. The mixture will become very thick. Remove the pan from the heat, and transfer all but about  ½ cup of the mixture to a heatproof container. (Use the reserved mushroom mixture just as you would condensed cream of mushroom soup.)

To the mushroom mixture remaining in the saucepan add the green beans, thyme, salt, pepper and remaining  milk. Place the pan over the heat and stir to combine the ingredients. Spoon the bean mixture into the reserved onions. Set the onions in an oiled baking dish, topping them with any of the bean mixture that remains. Sprinkle a few fried onions on top. Bake at 350°F until hot, about 15-20 minutes. Serve garnished with additional fried onions.


Wednesday, November 18, 2015

Try This Sensational Pear Bread

Most Tennessee Valley gardens are winding down, and the cold weather in the forecast for the next few days will likely put an end to crops that are not under plastic. If, like me, you have an abundance of fresh herbs at the end of the season, consider making flavored oil or butter. Either one is a great way to preserve fresh herb flavors for another month or more. This year, I have dill, cilantro, mint, parsley, and tarragon all flourishing, thanks to the mild fall weather.

As a rule, use about two tablespoons of minced fresh herb to season a stick of butter. Mix the softened butter with the herb and then form into a log. Wrap in plastic wrap, then in foil and freeze. Frozen, the log will keep for six months.

Herb oils are a little more trouble, but still simple to make. Place equal volumes of chopped fresh herb and the oil of your choice in the top of a double boiler. Place over barely simmering water and steep for 1 hour. Cool to room temperature, then refrigerate overnight. The following day, bring the oil to room temperature and filter it through a coffee filter. Store the herb oil in the refrigerator for a month.

I love making quick breads, and this week's featured recipe has quickly become one of my favorites. The recipe makes the right amount of batter for a disposable foil loaf pan. A standard loaf pan is larger. The recipe is easily multiplied, if you prefer. If you wish, you can increase the amounts of vanilla and cinnamon.

Serve the bread with fresh berries, or a poached or roasted pear half. Or enjoy it by itself. Either way, this is a delicious way to enjoy the seasonal flavor of pears.

John's Pear Bread
(1 loaf)

2/3 cup sugar
1/3 cup oil
1 egg, well beaten
¼ teaspoon vanilla extract (or a little more)
1 cup all-purpose flour
¼ teaspoon cinnamon (or a little more)
¼ teaspoon salt
¼ teaspoon baking soda
One ripe yellow Bartlett pear, peeled, stemmed, cored and finely diced


                Preheat the oven to 300°F. Oil a foil loaf pan. In a large mixing bowl, combine the sugar, oil, egg and vanilla extract. In a separate bowl, combine the dry ingredients, mixing well with a wire whisk. Using a large spoon, stir the dry ingredients into the liquid, mixing to form a uniform batter. Fold in the diced pear. Transfer the batter to the prepared pan, smooth down the top with the spoon, and place in the oven on the middle shelf. Bake for 1 ½ hours, or until a toothpick inserted into the bread comes out clean. Remove from the oven and cool in the pan for 10 minutes. Turn out on to a wire rack to cool completely, then return to the pan and store, covered, at room temperature for up to 3 days.  

Wednesday, November 11, 2015

An Under-Appreciated Fall Crop

We have known for a long time that certain flowers are edible. Violas, herb flowers of many kinds, and daylilies all have their uses in the kitchen. But our all-time favorite edible flower is the old-fashioned nasturtium. It tolerates poor soil, and actually performs best in low nitrogen soils. Its real value, however, lies in the fact that the leaves are edible as salad or cooked greens, and they are available from late spring through the first killing frost.

Nasturtium flowers look gorgeous on a salad plate or in soup. The leaves can substitute in a variety of dishes for kale, cabbage or cauliflower, either raw or cooked. We made nasturtium slaw recently by slicing the leaves into fine julienne and tossing them with a basic sweet-sour coleslaw dressing. When I make this again, I will use less sugar. This time of year, the nasturtiums are sweeter than fresh cabbage.

Nasturtium, botanically Tropaeolum majus, is a member of the cabbage family. No surprise, then, that the flavor is reminiscent of cauliflower or kale. All parts of the plant are edible. The flowers contain about as much vitamin C as an equal amount of parsley, and they have the highest lutein content of any edible plant. Presumably the leaves are similar in terms of vitamin C content. Lutein is a yellow pigment, so it is probably not as abundant in the leaves as in the flowers. In humans, lutein is thought to play a role in protecting the retina from damage by sunlight.

The large seed pods of nasturtium can also be harvested. Do this while they are still green. Drop them into a bottle of vinegar and let them sit a week or two, then use them like capers.

Nasturtium plants typically stop growing during the hottest days of summer, surging back again as soon as the weather cools down, and then growing luxuriantly until frost kills them. You can find the seeds on almost every seed rack in spring. Just scatter them where you want the plants to grow. In subsequent years, the plants should return from self sown seed. Look for seedlings around the first of May. Popular cultivars include 'Jewel,' 'Whirlybird,' 'Empress of India,' and 'Alaska.' The last one has variegated leaves, making an especially attractive display in the garden or on a salad.

Next spring, why not include a patch of nasturtiums in your edible garden? You'll enjoy them all season long.

Tuesday, November 3, 2015

Seasonal Eating: Easy Fall Pear Recipes

Luscious pears are in season right now. Bartlett, Comice, Bosc (pictured), and others are showing up in the produce section. Pears are a healthy and nutritious option for both sweet and savory dishes. Here are a few simple ways to prepare them.

For any of these recipes, begin by cutting the pear in half lengthwise. Using a melon baller, scoop out the core and seeds. Remove the stem and the blossom end. Add these trimmings to the compost bucket. The pears are now ready for cooking.

Pears Poached in Simple Syrup

1 cup water
1/2 cup sugar
1 stick cinnamon
2 whole cloves
A strip of lemon peel about 1/2 by 3 inches
1 or 2 pears, unpeeled, prepared as described above

Combine all the ingredients except the pears in a large saucepan. Set the pan over medium heat and bring to a boil, stirring to dissolve the sugar. Remove from the heat and immediately add the pear halves. Cover the pan and set aside to poach while the pan cools to room temperature. Keep refrigerated until ready to serve.

Poached Pears with Fruit Preserves and Fake Cream Chantilly

Poached pear halves, from the above recipe
Fruit preserves, berry, cherry, or what you will
1/2 cup fat free Greek-style yogurt
1 tablespoon confectioner's sugar
1/4 teaspoon vanilla extract
Fresh mint (optional), shredded

Set one of the pear halves, skin side down, in a serving dish. Fill the core cavity with preserves.

In a mixing bowl combine the yogurt, sugar and vanilla extract. Stir until smooth and slightly stiffened. Top the pears with the yogurt mixture and serve at once. Garnish with a little fresh mint, if you have some.

Pears Roasted in Vinegar

Raw pear halves, unpeeled, prepared as described above
2 tablespoons vinegar, preferably Champagne or Sherry

Preheat the oven to 375 degrees. Pour the vinegar in the bottom of a shallow baking dish. Add the pears, skin side up. Place in the oven and immediately reduce the heat to 300 degrees. Roast until the skins begin to wrinkle on top, about 20 minutes. If the liquid in the dish threatens to evaporate completely before the pears are done, add a little water. Test for doneness with the point of a kitchen knife, which should meet little resistance when inserted into the neck of the pear. Remove the dish from the oven and keep warm.

Serve the pears as a side dish, dribbled with a little of the juices from the baking dish.


Wednesday, October 28, 2015

Radio Silence

Our radio show, "Garden Talk," was abruptly cancelled last week when the station underwent a change in format from news/talk to alternative rock. Such is life these days in the radio business, or at least that is my understanding.

My co-hosts, Dr. Sue Hamilton and Andy Pulte, who have been doing the show much longer than I have, are determined to bring it back to the airwaves before next spring. We are researching possible venues and mustering our arguments.

I will update listeners as new information becomes available. In the meantime, folks can continue to send questions to knoxgardentalk@gmail.com or to post questions and photos on our Facebook page.

Readers of this blog are invited to send questions via the email link on the home page.

We welcome comments, suggestions for improvements, and anything else you would like to share regarding the "Garden Talk" program. Our plan is to create an even better, more informative, and more entertaining show as we seek a new, larger audience.

Although the 2015 garden has yielded up just about all of its delights, the current warm spell is prolonging the harvest for some crops. We are on track to have a great harvest of fall peas, especially given the good soaking rains we have received the past few days. We continue to harvest parsley and scallions, kale will be ready any day now, turnip greens are coming along, and the cilantro is lush and delicious. All indications point to some harvest well into November.

We have started some indoor crops that are thriving under artificial lights. If you like the flavor of fresh basil, but are appalled at its cost in the grocery store, your best bet is to grow a pot of 'Bush Spicy Globe' in a south-facing window or under lights. This variety has excellent flavor and will reach the size of a volleyball in a six-inch flowerpot. Grow it in any commercial potting mix, adding a half-teaspoon of timed-release fertilizer at planting time. You could also mix in an organic plant food, following the instructions on the package. Basil needs little attention, other than regular watering. Don't let the soil get dry enough for the plants to wilt. Clip sprigs for the kitchen judiciously until the plant is at least as large as a softball. Thereafter, you can snip with greater abandon. Keep plants producing by removing flower buds as they appear.

Want to start a vegetable garden next year, but not sure where to begin? Email for information about our Home Food First program. It's designed to help first time gardeners succeed, like having your own personal gardening coach.

Thursday, October 22, 2015

The Future of Gardening

I had the pleasure of visiting with Dr. Joanne Logan's class over at the University of Tennessee yesterday. A diverse group of freshmen from all over Tennessee and elsewhere has been spending the past semester learning where food comes from and how to grow it. I received the impression that this generation of citizens will take their food much more seriously than my generation did, and good for them!

I talked about overcoming the obstacles to home food production, problems such as limited space, little or no sunshine, and the ever-present demands upon our time. You can find an outline of my remarks posted under the "Go Vols" tab on this page.

The students seemed to be most interested in the various ways that technology is being applied to revolutionize the way food is grown. We discussed research on LED lighting systems that is currently taking place at UT. Check out this video.

We also discussed the new household appliances on the market, devices intended to automate and simplify food production right in the kitchen. One example is AeroGarden. Other innovations include systems that can be controlled from a smartphone or other mobile device, and professional automated systems that fit in the space typically required by a dishwasher.

As food gardening becomes ever more popular, watch for more innovations designed to make growing at least a portion of your own food a reasonable and cost effective approach for almost anyone. As with other segments of the Internet of Things, look for more digital gardening technology in the near future. Current gardening apps are often simply digital versions of older forms of garden planning and journaling aids. Newer innovations are likely to include a greater degree of customization for individual needs, such as tailoring advice to a particular region of the country.

Plant breeders are responding to the surge in home gardening, also, with each year bringing more offerings of compact-growing vegetables suited to container cultivation or small space gardens.

Food gardening is getting to be more fun every year. It's never too soon to start making plans to grow some food at home in 2016.

Wednesday, October 14, 2015

A New Flavor Treat

Do you recognize the plant in the photo? It is American beautyberry, Callicarpa americana. This plant is one of several growing in our garden. Having admired the beautyberry for years on account of its bright fall color display, we were delighted to discover that the berries are edible. They are easy to prepare, and, as I discovered just yesterday, easy to pick if you know how. If you want to experience a true American native flavor, you only need about a cup of berries.

Holding a suitable container in your non-dominant hand, be ready to catch berries as they fall from the branches. With your dominant hand, gently rub the berry clusters as you move along the branch, working toward the tip. Ripe berries should be easily dislodged and will fall into your container. This technique can be mastered with a few moments of practice.

Once you have a cup or so of berries, transfer them to a strainer and rinse thoroughly. Pick out any insects or bits of leaf or stem that have found their way into the harvest. Transfer the drained berries to a small saucepan and barely cover them with cold water. Bring the water to a boil over medium heat, then reduce the heat to maintain a gentle simmer and cook the berries uncovered for 20-30 minutes. The exact timing is not critical.

Remove the berries from the heat and allow them to cool briefly. Using a potato masher, crush the berries in the saucepan until you have a loose slurry of liquid and plant matter. DO NOT use a blender or food processor for this step, or you will break open the tiny seeds and ruin the product. When the berries are well-crushed, strain out the juice using a fine strainer lined with a coffee filter. Dampen the filter with water before you add the crushed berries, to prevent it from absorbing a lot of the berry juice. Allow the berries to drain for one hour at room temperature.

My one cup of berries produced 1/3 cup of juice after this treatment.

Combine the juice with an equal amount of sugar and heat over low heat. When the sugar dissolves, you have beautyberry syrup that can be poured over ice cream or cake. You can also cook the mixture down to produce a glaze or candy. Adding lemon zest to the juice and sugar mixture brightens the flavor. The syrup is a pleasing red-purple color, not as bluish as the fresh berries.

If you have enough berries, you can produce a larger quantity of juice and turn it into jelly, using pectin. To do this, you will need a quart or two of berries, more than I can obtain from the plants in my garden.

The flavor of beautyberry syrup is difficult to describe. It is grape-like, for sure, but with a toasted undertone reminiscent of freshly harvested grain. It is definitely a flavor worth a few kitchen experiments. As a starting point, you could treat it like pomegranate syrup.

Beautyberry thrives in ordinary garden soil with average moisture, although it is naturally found along stream banks and in other damp locations. Established plants need no special care, and will grow well with half a day of sun or more. They need not be fertilized and can either be left unpruned or pruned back in spring to a foot or so in height. Pruning results in a plant about half the normal size. Mature plants form mounds six to ten feet across when left unpruned.

Friday, October 9, 2015

Preserving the Bounty

Something about the harvest season and the changing leaves compels us to put food up for the coming cold weather. I always find it helpful to have some "universal" recipes available that can be applied to whatever I happen to find in the market or have on hand.

This season, we have pickled just about everything pickle-able and have not been disappointed in any of the pickles we have sampled so far. Refrigerator pickles keep for at least a month or two, and can be made out of any vegetable or fruit that is firm-fleshed enough to withstand the treatment. Pickling solutions are usually half water and half vinegar. Use a commercial vinegar that has been adjusted to 5% acidity. Artisanal vinegars can be used for refrigerator pickles, but bear in mind that a lower acid content may give different results and may reduce the keeping time.

To the basic mixture you can add varying amounts of salt (a basic ratio is one teaspoon of salt per quart of liquid) and sugar. Sugar can equal the amount of vinegar if you desire a syrupy sweet pickle. All manner of spices may be added. I recommend using only whole spices as ground ones will make the liquid cloudy. Ginger, hot peppers, bay leaves, and garlic cloves may also be used to flavor the pickling liquid. As a general rule, make a volume of pickling liquid equal to the volume of the jar. That is, for a pint of pickles, make two cups of liquid, to insure that you have enough to cover the vegetables. You will have some liquid leftover that can be used to make salad dressing, for a smaller batch of pickles, etc.

The basic procedure for refrigerator pickles is simple. Wash a jar in hot, soapy water, and keep it hot in a warm oven while you prepare the vegetables. Select only perfect vegetables for pickling. Cut them into uniform pieces. Bring the pickling juice ingredients to a boil over medium heat, add the vegetables, remove from the heat, and allow to cool a few minutes. Remove the vegetables from the liquid and pack them into the prepared jar. Pour the hot pickling liquid over the vegetables. Apply a lid and set the jar aside to cool to room temperature before storing in the refrigerator.

A great technique for a small amount of fruit is to make a mostardo. This is a mustard sauce that can be varied infinitely to suit your taste. Let's say you picked a handful of wild berries or plums or persimmons while on a walk in the woods. Wash and chop the fruit, removing any large seeds or other inedible debris, but leaving skins on. Combine the chopped fruit with an equal amount of sugar in a small saucepan. Stirring constantly, bring the mixture to a boil and cook until it is slightly thickened. The time required for this will vary with the type of fruit. When the fruit and sugar mixture has a nice consistency, remove it from the heat. Add mustard to taste. For example, you might use a dry mustard, such as Colman's, mixed with a little water or a coarse-grained mustard such as Grey Poupon or your favorite mustard or a combination. You could dress it up with whole yellow or black mustard seeds. Store the mostardo in the refrigerator and use it to season pork or poultry, or as a sandwich spread.

Fall is the best time of year to look for foraged mushrooms at the farmer's markets. Unless you have appropriate training and experience, do not forage your own mushrooms. Purchase from the experts, instead. Look for yellow chanterelles, a special delicacy, along with oyster mushrooms, hen-of-the-woods, chicken-of-the-woods, and several others. Wild mushrooms make a great addition to stir fries and casseroles. Do not be tempted to eat them raw, as some can cause indigestion unless cooked.

The best way to preserve most wild mushrooms is to dehydrate them. However, some cannot be preserved by any practical method and should always be cooked fresh. Your best bet is to talk to the forager regarding the best uses and preparation methods for the mushrooms he or she is selling.

Nuts are in season in fall, also, and most people will have to rely on the market for their supply, as nut trees are typically enormous and require several years to bear a crop. If you are into indigenous foods, you can purchase black walnuts, hickory nuts, and wild pecans online. The links given are examples. Other sources are out there, also. Nuts can be frozen for about six months without losing quality. Store them at room temperature for about a month.

Monday, September 28, 2015

Some Thoughts About Grasses

Too many gardeners think of grasses as turf, without regard to the many grasses that have ornamental value. Some of theme can be useful, too. For example, Japanese maiden grass, Miscanthus sinensis, is available in numerous cultivated forms. It is adaptable, tolerant of poor soil and low moisture, and makes an effective screen fence or hedge. Propagation is simple, too. This plant deserves wider application in home gardens.

Japanese maiden grass does require annual maintenance. After frost sends it into dormancy, the old growth should be cut back to about a foot tall. This will make for a tidier and more shapely clump the following season. The hay this trimming produces is a great mulch for other plants. If allowed to dry out, it can be chopped and composted along with autumn leaves.

If you have a lawn, September and October are the best times for annual chores such as aeration, over-seeding, fertilization and weed control. I will repeat the admonition to set your lawn mower as high as possible. When grass is allowed to grow tall, it also develops a strong, healthy root system that will help keep it green and thriving through adverse summer weather. Tall grass also smothers weeds before they can gain the upper hand.

Numerous other grasses find uses as ornamental subjects. Many produce their blooms in late summer and fall, adding to the show of colorful blooms and autumn leaves. Among our favorites are:

Japanese forest grass 'Aureola'--A low, growing plant with yellow variegation in the leaves, it does well in shade where few other grasses thrive.

Foxtail grass 'Cassian'--Dramatic blooms from neat clumps of foliage about three feet in diameter; this grass is easy and drought tolerant.

The vegetable garden continues to yield both cucumbers and peppers that are better in quality than they were before the weather cooled down. Fall plantings of kale, spinach and parsley are coming along nicely. We even have a few late tomatoes, from self-sown seeds growing in the compost area.

This is a great time to think about preserving some of the end-of-season abundance, from the backyard as well as the farmer's market.


Monday, September 21, 2015

Garden Renovations

September and October typically offer beautiful weather in the Tennessee Valley, and that makes these months excellent for garden renovation projects. Cooler, drier weather makes working outdoors a pleasure. Soil amendments added now will have time to break down and contribute their intended components to the soil chemistry by spring, in time for next year's plantings.

Some of our trees and other plantings have grown so much that they have now begun to shade the vegetable growing beds. These beds will need re-locating, so we have taken down the tomatoes and okra that were in them. It is a bit early. The plants would have continued to bear, albeit not as well as if they were growing in full sun, until frost. But we don't want to do the work when it's cold and windy, so we will forego the remaining fruits.

It is worth making the point that your garden, first and foremost, should be about you. Your interests, your tastes, and your needs should all be reflected in your garden. Never fear to rip out a plant that is not doing well, or that you find you don't like as well as you thought at first. You are the controlling hand in the garden.

Despite there being only about 30 days until the first suspected frost, you can still get in a crop of fall greens. Try arugula (pictured), bok choy, radishes, mizuna, and chervil. All of them mature quickly and all are frost tolerant. Plant a patch of Seven Top Turnips within the next week, and you should be able to enjoy several pickings of greens, as they are frost hardy. Plant lettuces in containers; one of our favorites for this purpose is Tom Thumb. If frost threatens, container plants can be brought indoors for the night, thus extending the season. You should be able to harvest a nice salad for Thanksgiving dinner.

It is not too early to begin thinking about your vegetable garden for next year. We are launching an exciting new project that will result in another how-to book. More about this as the season progresses, but for now, think about what you would grow in only 100 square feet of outdoor space.

Monday, September 14, 2015

Late Season Gardening

Yesterday I transplanted some kale plants we started a few weeks ago. The cultivar is 'Dwarf Blue Scotch Curled.' It makes a compact plant ideal for the small space garden. I removed some spent pepper and basil plants, making room for the kale and some spinach that I plan to move in later this week. The current spate of cool weather is ideal for all kinds of garden projects.

We are still harvesting beans, cucumbers, okra, tomatoes and peppers from the summer garden, while scallions and parsely start to mature from late plantings. It will soon be time to start seeds for fall lettuces, along with some other items that will move indoors when frost threatens.

Our best crop of beans this year has come, believe it or not, from container plantings. By using a sterile potting mix and incorporating a legume innoculant into the mix at planting time, we have achieved some beautiful filet beans with no hint of trouble. We have found a bean beetle here and there, but they are easy to control by hand when the crop is small.

We have also begun making plans for next year's garden. As was the case during 2014, when we wrote two gardening books for Random House, we are going to garden in 2016 with a new book in mind. Our plan is to select a single small space and demonstrate just how much produce can be grown with limited resources. The area, which is about 100 square feet, has been a multipurpose raised growing bed for years. At the moment, it is home to cucumbers, sweet peppers, hot peppers, scallions, parsley, turnip greens and kale, with room for the small planting of spinach I mentioned above. We will continue to share details as this project evolves.

Looking for a way to deal with an abundance of peppers? Check out this red pepper relish recipe, which keeps for weeks in the refrigerator. The seasonings are similar to those used for bread and butter cucumber pickles. The relish is great on chicken or pork, and makes killer pimento cheese. If you wish to add heat, include a hot pepper with the chopped sweet peppers, keeping the total amount the same.

Bread-and-Butter Pepper Relish

Makes one half pint (one cup)

1 1/2 cups finely diced sweet red peppers
1/2 cup finely diced red onion
2 tablespoons apple cider vinegar
2 tablespoons granulated sugar
1 teaspoon whole yellow mustard seeds
1/4 teaspoon celery seed

Combine all ingredients in a small saucepan. Cover, place over medium heat and bring to a simmer. Stir, then adjust the heat to maintain a bare simmer. Cook, covered, until reduced to one cup, about 25 to 30 minutes. Allow to cool. Store in a covered container in the refrigerator for up to 6 weeks.


Monday, September 7, 2015

Saving Seeds

Late summer is a great time to save seeds for next year's garden. Many of our favorite annuals, vegetables, and native plants are maturing seed now, and the often pleasant late summer weather is conducive to getting out in the garden and harvesting them. Here are a few tips for seed saving at home:

1. Moisture is the enemy. If you harvest seeds that are too green, or leave too much green plant matter with them, or store them in a location with high humidity, they are likely to mold. Always harvest fully mature seeds. When in doubt, wait a few more days. Harvest after a period of dry weather. Remove as much chaff as possible before storing seeds.

2. Use paper bags, not plastic. Harvest entire seed heads from plants such as dill. Place the seed heads upside down in a paper lunch bag. Fold over the top of the bag, label, and place it in a warm, dark location, such as an interior closet. In a week or two, you can separate and discard most of the chaff easily. This works for cilantro, many varieties of annual flowers, and native plants such as lobelias and milkweeds.

3. Hands came before tools. The most effective tools for breaking small seed capsules, plucking the fluff from milkweed seeds, and similar tasks are your hands. Seeds are often tiny and delicate. Handle them with care.

4. Wet seeds need special attention. Seeds of tomatoes and cucumbers are surrounded by a jelly-like material that must be dealt with to prevent mold damage. One recommendation is to place the seeds and their jelly in a jar of water and let the mixture ferment for a week or so before straining out the seeds. Rinsing the seeds repeatedly in a strainer removes any residual material, and the seeds are then spread out to dry prior to storage. This is a suitable technique for producing seeds in large quantities, but if your needs are limited to a few dozen seeds of any given plant, there is a better way. Simply remove the seeds and their jelly with a spoon and spread the mass out on a paper towel, in such a manner that individual seeds are spaced a short distance apart. Use the back of the spoon to assist in this task. Allow the seeds to dry on the towel for a day or two in a warm, airy spot. You should then be able to pick off individual seeds with a pair of tweezers, or by scratching gently with a fingernail. The jelly material will remain behind, absorbed into the fibers of the towel, producing no mess and no smell. You can simply toss the towel into the compost bin when you have harvested the seeds.

5. Native plants may need a cold period. Many native plants produce seeds that will sprout only after they have been subjected to a period of wet, cold weather, as we normally experience each winter. These seeds should be planted out soon after harvesting. Either plant in containers, or label a spot in an outdoor bed, so you won't forget next spring and dig up your seedlings by mistake.

It is worth noting that the fruits of some native plants may contain chemicals that irritate the skin of sensitive people, much like poison ivy. For example, the fruit cluster in the image is green dragon, Arisaema draconitum. The juice from the red berries is an irritant. For safety's sake, wear disposable gloves when working with any plant material, until you are sure you won't experience any consequences. This type of fruit, by the way, is a good candidate for the "let it rot" approach noted above. Along the same lines, beware when removing the relatively dry seeds from hot peppers, as the juices can burn your eyes and skin.

6. Store seeds dry and cold. Vegetable and flower seeds that you will plant next spring should be stored in an airtight container in the refrigerator. Plastic food storage containers work great and are inexpensive. Place individual seed varieties in small paper envelopes. Save the silica gel packs that often come with electronic equipment. Place several packs in the storage container to keep humidity low. Do not store seeds in the freezer.

The seeds of beans, peas and other legumes are easy to save. Allow the pods to dry thoroughly on the plants and then shell out the seeds.

Remember that it is worthwhile saving seeds only from "open pollinated" vegetable varieties. These are non-hybrid plants that will come true from seed next season. Hybrids typically produce seeds that revert to parental types. Make sure you know the plants from which you are obtaining seeds.

Butterfly and hummingbird flowers typically are among the easiest annual plants to grow from seed. They include milkweeds, salvias, morning glories, and the huge annual aster family, including sunflowers, daisies, cosmos, asters, marigolds, zinnias, and many others. For these plants, you need only purchase seeds the first season, and you should have all you need thereafter. The same caveat applies to hybrid plants in this group as was mentioned for vegetables. However, in the case of flowers, it may not matter if the offspring are a bit different from their parents, as they usually bloom and attract pollinators anyway.

Tuesday, September 1, 2015

Mother Nature's Gardens

Around here, it's the spring wildflowers that get all the attention. We have had a Wildflower Pilgrimmage up in the Great Smoky Mountains National Park for decades. One reason for the intense interest lies in the amazing diversity of our spring flora, with numerous families from orchids to aroids represented.

Goldenrod
The fall flower show is a little bit different. For one thing, most of the flowers are from a single family, the asters. For another, you don't have to drive to the Park in order to enjoy the display. Some of our most spectacular fall bloomers thrive in roadside ditches, open fields where the soil has been disturbed, and at edges where development meets the woods.

Just for fun, yesterday I did a little survey of the plants that are presently blooming between my house and the grocery store I frequent, a distance of about 1.2 miles. Much of the area is covered with asphalt or buildings, but there is a huge open space (intended for future development) lying between the county road and the Interstate. It is along the edge of this space that the majority of the flowers can be seen, and the diversity of species is such a small area is remarkable. Here is my list:

Asters (Aster sp.)--Notoriously difficult to identify to the species level, there appears to be at least two species

Goldenrod (Solidago sp.)--Another group of species that are difficult to separate, this one is probably S. rugosa, or common rough goldenrod

Ironweed (Vernonia noveboracensis)--Among the most intensely purple blooms to be found in the plant kingdom, this tall plant thrives in moisture-retentive soils.

Tickseed (Coreopsis)--Bearing bright yellow blooms with notched petals, this plant has been domesticated to produce numerous cultivars.

Calliopsis (Coreopsis)--This group of plants was once a separate genus, but now is considered part of the Coreopsis species complex. The yellow blooms often have bright red centers. It is another example of a wildflower domesticated for the garden.

Black-eyed Susan (Rudbeckia hirta)--This roadside perennial is the parent of 'Goldsturm' and numerous other cultivars for the garden.

Joe Pye weed (Eutrochium)--The most common species in North Knoxville appears to be E. maculatum, or spotted Joe Pye weed.

Snakeroot (Eupatorium)--This plant is similar to Joe Pye weed, but the flowers are pure white, whereas Joe Pye is a dusty rose color.

Sunflower (Helianthus)--The ones in my area are probably H. tuberosus, the perennial also known as Jerusalem artichoke.

Cockleburr (Xanthium)--Always considered a weed, owing to its spiky fruits, this plant produces pale yellow female flowers that look rather pretty at a distance.

Ragweed (Ambrosia)--Despite the connotations of its botanical name, this plant is responsible for a large number of seasonal allergy problems, often known as "hay fever." Please note that the other asters mentioned here do not produce lots of wind borne pollen, and therefore do not perpetrate allergy reactions in humans. Too often, goldenrod or one of the other fall blooms gets the blame, while the real culprit, ragweed, with its insignificant greenish-yellow flowers goes unnoticed.

Cardinal flower (Lobelia cardinalis)--Bright red bloom spikes appear all summer long where the soil stays moist. This plant is common along an I-75 drainage swale near the house.

Everlasting pea (Lathyrus)--An established exotic weed, this plant had lovely pink and white flowers for most of the summer. It used to be cultivated, but has proved too invasive for the garden.

With the exception of the last two, all these plants are asters.

As the vegetable garden winds down and your summer annuals begin to look a little ratty, take a moment to enjoy the floral display along our Tennessee roadways during this late summer season. If you are traveling in the Cumberland Plateau region, you may see several others, such as meadow beauty (Rhexis), in addition to the ones named above.

Wednesday, August 26, 2015

Fall Garden Festival in Crossville

Jerry and I spent the day yesterday enjoying the Fall Garden Festival at the Plateau Experiment Station near Crossville, TN. In case you missed my presentation on fall vegetable gardening, I am posting the information from the handout I provided to festival attendees. You can email me with fall gardening questions, if you like.

Don’t Stop Now: Third Season Gardening in Tennessee
The approximate date of the first frost is October 20.
The approximate date of the first hard freeze is November 20.
You may have time for broccoli, Brussels sprouts or cauliflower if you can find good plants, or have already started seeds.
Think leafy greens and root crops for your main focus.
Fast maturity, frost tolerance, and overwintering capability are important considerations.
Pre-soak seeds to speed germination, especially carrots, parsley, beets and kale; direct sown seeds will germinate quickly in warm soil.
Some good choices and approximate maturity times are:


                arugula – 30-45 days
                bak choy – about 40 days
                beets – about 60 days, O
                carrots – about 60 days, O
                chard – about 60 days, O
                chervil – about 45 days, O
                cilantro – about 30 days, O
                cress – about 40 days
                kale – about 75 days, O
                lettuce – about 60 days
                mache – about 60 days
                mizuna – about 40 days
                mustard – about 40-60 days
                parsley – about 70 days, O
                scallions – about 60 days, O
                spinach—about 50 days
                tatsoi – about 45 days
                turnips – 30-45 days, O
O = often will overwinter in garden


Using season extending techniques can add up to a month of grow/harvest time.
Grow smaller plants in containers that can be moved indoors at night.
Use spaces where summer annuals grew for additional growing opportunities.
Covering a raised bed with plastic held up by PVC hoops has proven to be one of the cheapest, most effective methods for extending the season.
You can also build a temporary cold frame, using straw bales or concrete blocks and some old window sashes. (Check a window replacement company for these.)

Some Recommended Varieties

These recommendations are based on experience in our Zone 6b garden. All these vegetables can be direct seeded for fall harvest.

arugula – Speedy, Even’Star Winter, Roquette, “wild”
bak choy – Mei Quing
beets – Early Wonder, Detroit Dark Red, Early Wonder Tall Top
carrots – Atlas (containers), Little Finger, Danvers 126
chard – Lucullus, Neon Lights
chervil – Brussels Winter
cilantro – few named cultivars
cress – Belle Isle
kale – Dwarf Blue Curled, Lacinato, Red Russian, Vates
lettuce – Rougette de Montpelier, Tom Thumb, Ashley, Lollo Rossa, Rouge d’Hiver, Forrellenschluss,     Freckles, many others
mache – Salad Zing, Vit
mizuna – few named cultivars
mustard – Red Giant
parsley – Moss Curled, Italian
scallions – Evergreen White Bunching
spinach—Winter Bloomsdale
tatsoi –few named cultivars
turnips – Seven Top

                You can also plant transplants of these varieties. Garden centers typically have plants ready at the proper time for their location. These vegetables require about six weeks from seed to transplanting size, and so must be started in mid- to late-July for September transplanting. Once they resume growth, they are generally very cold tolerant.

broccoli—Di Cicco, Waltham 29
Brussels sprouts—Catskill
cabbage—Early Jersey Wakefield, Savoy Perfection
cauliflower—Snowball Self-Blanching (fall planted only)
kale—(see above)
kohlrabi—Early Purple Vienna
leek—King Sieg, Broad London, American Flag

Perennial onion bulbs are also planted in fall.

Monday, August 10, 2015

Green Beans and Haricots

My hometown of Greeneville, Tennessee, has a fine historic hotel on Main Street, The General Morgan Inn. Its restaurant, Brumley's, is well-regarded and serves up some of the best food in town. Last February, we dined there. I ordered the trout, which is sourced from a farm just across the mountain in North Carolina. It came with rice pilaf and "haricots verts" according to the menu. I was dubious about being served haricots verts in February, when they are anything but in season, especially given that these slender French green beans are notoriously difficult to preserve, either by freezing or canning. When the plate arrived, next to the fabulous trout were some ordinary Blue Lake type green beans, undoubtedly from Mexico given the season. They had been blanched sufficiently to brighten their green coloration. They were also as tough and fibrous as a cornstalk. I mentioned this to the waitress, who replied that "a lot of people" think they should instead be cooked Southern style. Indeed.

The chef may have demonstrated a lack of knowledge, by offering green beans as "haricots verts," which does literally mean "green beans." He may also have been trying to pass off the cheaper product upon an unsuspecting and presumably ignorant dining public. Therefore, to arm readers against such impositions in the future, here is the skinny on green beans.

As one blogger recently pointed out, when a Southerner tells you how to cook green beans, shut up and listen. Modern snap beans, the cultivars we most often think of when we think of "green beans" have been bred to survive unscathed the strictures of mechanical harvest and industrial scale processing. They are at their best after being subjected to the rigors of the canning process, which renders them tender and brings out their flavor. They require a reasonable amount of cooking time when prepared fresh, about 30 minutes to an hour, preferably in water with some sort of cured pork added to it.

Green beans that lend themselves to quick cooking exist. Most are heirloom varieties. Carefully read catalog listings if you are looking for a green bean that lends itself to cooking "Yankee-style."

On the other hand, true haricots verts, also called "filet beans," are intended to be cooked only a few minutes. They are tender, buttery and full-flavored when they are about an eighth of an inch in diameter. At this size, most varieties are about five to six inches in length.

Gardeners who want green beans for fresh use (as opposed to canning) should consider growing the true haricots. This season, we have grown 'Fantastic Filet' from Burpee. We have been getting three pickings from each group of plants. Some of the best have been from containers, surprisingly. We sowed an oblong planter as part of a demonstration of container vegetable gardening, and were surprised when it avoided bean beetles and yielded up as large a harvest as a comparable planting in the ground. The 30-inch long planter provided just the right amount of beans for two servings, about every four days. Filet beans mature quickly, in about 60 days, so there is still time for a planting or two before the end of the season.

Monday, August 3, 2015

The Sandwich of Summer

With August comes an abundance of tomatoes in the Tennessee Valley, and throughout much of the country. And therein lies an interesting story. In the days before refrigeration, one of the most important methods of preserving meat was curing it with salt. Pigs were slaughtered during cool or cold weather, but once the meat was salted down, it could be kept for months. Thus, it was possible to enjoy a bacon and tomato sandwich in August in Tennessee, even though hog-killing time is January. The combination of bacon and tomato (lettuce was added later to create the BLT) was so popular that investors would buy up salted pork bellies while they were cheap in winter, and then hold them until tomato season when demand for bacon could be counted upon. It has only been a few years since pork bellies were an investment vehicle on the commodities market. Refrigeration made bacon available at any time of the year, and the opportunity for significant profit evaporated.

Refrigeration also made iceberg lettuce available year round, and the spread of the technology seems to coincide with the history of the BLT. The sandwich was probably not around prior to 1900, but by the 1950s it was being mentioned in the popular media of the time, such as the Saturday Evening Post. Today, it is considered by some to be second only to the ham sandwich in popularity with Americans.

In the prime tomato country of the upper South, and the Tennessee Valley in particular, tomatoes have been an important crop for decades, certainly long before refrigeration was commonplace here.  It seems likely that a sandwich of bacon and tomato, with or without a garnish of leafy greens, was a favorite here well before the BLT became famous. And of course a lot of folks would not have had bacon. The simple tomato and mayonnaise sandwich has long been revered in this region, and recently made the cover of Garden and Gun.

Growing iceberg lettuce in Tennessee in the summer is impossible. What, therefore, is the gardener to grow with which to garnish the beloved BLT? If you plan ahead, you can have several options for summer lettuce substitutes. Malabar spinach is easy to grow and productive. Another possibility is basil. Large-leaved varieties like 'Mammoth' are perfect. If you grow sweet potatoes in your garden, you can also harvest their leaves to add to a sandwich now and then. The leaves of nasturtiums taste like watercress. Also consider green onion tops, chives, and squash blossoms. In all cases, younger, smaller leaves are likely to be the most tender and tasty.

Not growing any of these? Try sprouting some alfalfa or growing some microgreens. Either one is ready in about a week. You can grow sprouts right on the kitchen counter, if you like. Purchase seeds intended for sprouting. They are available at Three Rivers Market, Earthfare and other natural foods stores. A tablespoon of alfalfa seeds will yield about a quart of sprouts, which will keep a week in the refrigerator after sprouting. Microgreens can be grown in a variety of containers, such as those plastic clamshells that berries come in. Unlike sprouts, microgreens are grown in a soil-like medium. Typically, seeds are sown thickly and the plants harvested a week or so after germination. Microgreens require more light than sprouts, which will green up in indirect light. Microgreens need a south-facing window or an artificial light source for best results.

With a little imagination, you can improvise upon the classic BLT to discover your own favorite summer sandwich. Because the recipe is so simple, quality ingredients are important. Here is my favorite recipe:

Ultimate Knoxville Bacon and Tomato Sandwich

Yield: 1 sandwich

2 slices sandwich bread from Flour Head Bakery, white or wheat as you prefer
Duke's mayonnaise
Freshly ground black pepper
1 slice of tomato, preferably homegrown and vine ripened, or more as desired
2 slices Benton's bacon, cooked to your desired degree of crispness
1 or 2 fresh basil leaves
2 or 3 fresh nasturtium leaves
2 tablespoons alfalfa sprouts

Spread one side of each slice of bread with mayonnaise and top with a few grinds of black pepper. Place the tomato on one slice. Break the bacon into pieces and place it on top of the tomato. Add the basil, nasturtium leaves, and alfalfa sprouts, and top with the other slice of bread.

Serve the sandwich with potato chips and vegetable pickles.

Monday, July 27, 2015

Thinking About Tomatoes

It won't be long before every gardener in the Valley is inundated with tomatoes. August is traditionally our best tomato month, but many people are already harvesting early fruit. We have been getting good production from our Chadwick Cherry, Amy's Sugar Gem and Marglobe plants for about a week.

The Chadwick Cherry and Amy's Sugar Gem plants have been grown in straw bales, after conditioning the bales as described in my book, Idiot's Guide: Straw Bale Gardening. The book is available here. Supported by a sturdy trellis, one plant per bale, these have grown into some of the finest tomato plants we have ever produced. See the photo. This is only two Chadwick Cherry plants, and the trellis is 6'6". The reason they are doing so well is probably the absence of soil-borne fungal diseases on the leaves. Growing in straw bales offers nearly complete protection from this problem. I was pleased to learn that Holly Jones, who is in charge of the kitchen garden at UT Gardens, has had similarly good results with tomatoes in straw bales. I strongly urge anyone interested in heirloom tomatoes to give this technique a try.

We have had a bumper crop of cucumbers and squash. The early cucumber plants came down last week, and the early squash plants are showing signs of exhaustion. We have already made second plantings of these crops for harvest in September and October.

If you grow okra, pick it every day to keep the plants producing. Okra keeps about five days in the refrigerator, and is easy to freeze. Just wipe the pods with a kitchen towel, drop them into freezer containers, label and freeze. If you want to slice the okra, you can do that before freezing, but you can also cut them up after thawing. The choice is entirely yours.

The high temperatures and heavy rainfall we have experienced this month have stressed some plants. Tomatoes, in particular, have shown signs of heat stress. If the leaves on your plants curl upward but look otherwise normal, the plants are heat stressed. Apply mulch early in the morning hours to help keep the soil cool and evenly moist. Also, pay attention to rainfall patterns. A good downpour should suffice for about two days before your plants need irrigation. When in doubt, stick your finger into the soil. If it does not feel moist in the first inch or so, it is time to water. Avoid wetting the foliage, as this encourages fungal diseases. Water the plants deeply and thoroughly. Uneven soil moisture levels lead to cracking and blossom end rot. Be especially careful with watering during hot weather. It is probably best to water late in the day, as the air is cooling off, rather than early in the morning. A drenching followed by hot sun can cause fruits to absorb water so fast they split.

Our present weather pattern favors peppers. Green fruits should be setting on most varieties by now. This would be from plants transplanted around the first of June. Bell peppers and other large-fruited varieties will benefit from thinning. Multiple fruit clusters should be thinned to a single fruit. Use the removed ones in the kitchen. Thinning will lead to larger and more flavorful fruits, and helps prevent branches from breaking under the weight of a heavy fruit set. You can also thin hot peppers if you want prize-winning size fruits, but the hot varieties are so vigorous it is not really necessary. If you do thin, take care. Hot pepper juice can burn your eyes and skin, and the stems have heat just like the fruits do.

Small hot peppers, either green or fully ripe, can be easily preserved in vinegar or sherry. Select a bottle and thoroughly clean it. Place some peppers in the bottom of the bottle, then fill it with sherry or the vinegar of your choice. Apply the cap and set the bottle aside in a cool, dark place for at least two weeks before you use it. The amount of heat will depend upon how many peppers you use. About half a cup of peppers for each cup of liquid will produce a product comparable to commercial hot pepper vinegar. Small fruited peppers work best for this, or you can cut larger peppers into chunks. Always wear plastic gloves when handling hot peppers, and take care not to get the juice in your eyes.

Tuesday, July 14, 2015

More Ways to Save Summer

Jerry and I will have a table at the UT Gardens Farmer's Market on Wednesday, July 15. We will be there to answer gardening questions from 4:00 to 7:00 PM. There will be food, music, and of course multiple vendors of local produce and other farm products. The market is pet and kid friendly, so why not bring everyone and join us? Free parking near the entrance to UT Gardens.

Important Note: The UT Gardens Farmer's Market always has a special table where you can leave excess produce to be donated to Second Harvest. In our case, we have a bag of cucumbers. I have made all the pickles we will use until next season, and we still have plenty coming along. This is a great way to deal with all that summer squash or whatever abundance your garden has been blessed with. Some people even buy extra vegetables from the vendors, just to donate to this worthy effort.

One thing I always look for at the summer markets is fresh local fruit. Whether it is wild blackberries, peaches, or something else, the flavor and quality of locally grown, naturally ripened fruit is impossible to obtain in fruit shipped here from California. One of the best ways to take advantage of seasonal fruit is to use the simple, time-honored technique of making preserves. Of all the sweet treats you can make from fresh fruit, preserves are the simplest. They will also provide you with the greatest number of options when using the finished product.

You will need a kitchen scale for this recipe.

Universal Recipe for Fruit Preserves

1 pound fresh fruit
12 ounces sugar

Prepare the fruit as you would for eating it fresh. That is, peel, pit or stem fruits as needed and cut larger fruits, like peaches, into bite size pieces. To prevent darkening, use a commercial product such as Fruit Fresh(TM) according to the label directions. Place the prepared fruit and the sugar in a large, heavy bottomed saucepan. Stir the fruit and sugar together, bruising the fruit slightly and allowing some juice to be released. Don't get carried away with this. You want to retain the shape of the fruit as much as possible. Set the pan over medium heat and bring it to a simmer, stirring occasionally. Watch carefully and regulate the heat so the mixture does not scorch. As soon as the boiling point is reached, remove the pan from the heat, cover, and allow it to cool to room temperature. Leave it sitting overnight, and do not open the lid. The following day, you should have slightly translucent fruit floating in flavored syrup. You can store the preserves in the refrigerator for a month, or can them. Using a slotted spoon, transfer the fruit to half-pint canning jars. Ladle the syrup over the fruit, leaving 1/4 inch head space. (Store any additional syrup in the refrigerator. It is delicious on ice cream or to flavor whipped cream, etc.) Wipe the rim of the jar with a damp kitchen towel to ensure a good seal. Apply lids and bands and process the jars in a boiling water bath for 10 minutes, or 15 minutes if you live above 1000 feet elevation.

Preserves can be used as a dessert topping, or can be mixed with other ingredients depending upon your needs. For example, peach preserves can be thickened with cornstarch paste to use as pie filling. I have made cherry preserves into a killer barbecue sauce, The possibilities are limited only by your imagination. Make a batch of preserves and enjoy summer flavor all winter long.

Monday, July 6, 2015

Time to Re-Plant

Early July is a good time to replant certain crops for a late harvest. Among the choices are beans, beets, carrots, cucumbers, squash, tomatoes, peppers, parsley, basil, and scallions.

Most bush bean varieties mature quickly, allowing you to plant them in succession all summer long. Unfortunately, when we have a spate of temperatures above 90, as we did in June, beans suffer from heat stress. It appears that temperatures will be more moderate for the next few weeks, which bodes well for late crops of beans.

Beets and carrots perform best in cool weather, but will nevertheless germinate and produce a crop in about 60 to 70 days, or early September if planted now. You can expect smaller roots, but more intense flavor, in summer-grown beets and carrots.

Cucumbers mature in about 60 days, and will appreciate the cooler night temperatures that will be arriving in late August. High heat stresses cucumbers and may interfere with proper pollination, resulting in deformed fruits. Later crops will not have this problem.

Late plantings of summer squash are less likely to be attacked by the squash borer, although it is wise to keep them covered until flowers appear. Squash borer populations are at a low ebb this time of year, so there are simply fewer females out flying around looking for plants on which to lay their eggs.

Tomato and pepper plants will respond quickly when transplanted into warm soil. Some garden centers will have plants ready for this time of year. If you cannot find pepper plants, there is not a lot you can do, as it is too late to start them from seeds. In the case of tomatoes, however, you can remove suckers that naturally form on your earlier plants. Remove all but the top two tiers of leaves from each sucker and drop the stems in a glass of water. They should root before the end of the month and can be transplanted as soon as the roots are two inches long. Keep them well watered until new growth is obvious, feed with a balanced fertilizer, and expect tomatoes right up until the first frost. You can hasten rooting of the cuttings by placing some willow cuttings in the water with the tomatoes. Cut six to eight inches from the tip of a willow branch and remove most of the leaves. In a glass of water, the willow will root with remarkable speed. As it does so, it releases plant hormones into the water that will encourage rooting by other cuttings.

Parsley, basil and scallions can all be direct seeded now. Barely cover the seeds with fine soil and keep them watered if rain does not arrive. Thin them as soon as true leaves have appeared, or when scallions are two to three inches tall. It won't take them long to get big enough to harvest. You can also root cuttings from established basil plants, following the instructions for tomatoes.

Keep garden fresh produce coming all season long by re-planting now.