Welcome to February, known to the Cherokee as the "Starving Moon." It was a time when stored food was running low, but the spring greens and awakening wildlife had yet to appear. No doubt, it was a time when the most vulnerable often died.
We are fortunate to have any and all foods available to us year round, from fresh asparagus in January to strawberries for Christmas. This is a recent phenomenon. Supermarkets did not begin to appear everywhere until after World War II. I can recall my mother, who was born in 1926, saying that celery and oranges were special treats available only during the Christmas season.
Thus, we need only go back in time a few decades to know that pickled, dried, and otherwise preserved foods were essential to our ancestor's survival in the Appalachian region. Most famously, our hams and bacon form the flavor base for iconic Appalachian foods. Beans or greens made without cured pork have only recently come into vogue, and are definitely non-traditional.
Our ancestors made pickles out of everything from watermelon rinds to pig's feet, demonstrating that the "zero waste" food movement is, in fact, old hat around here. To this day, I stock the pantry every summer with pickles, the choice depending upon what is seasonally or locally abundant. Using them throughout the cold months brings a touch of warm weather to the table. Did you know that pickled okra can substitute for fresh in a gumbo or fry? It will have lost its thickening ability, but the characteristic flavor remains. You can make pickles out of virtually any vegetable or fruit.
Dried foods were also important to our ancestors. Apple stack cake would not be the same without dried apples for the filling. Green beans, or "leather britches," were typically strung on thread and hung on the side of a building to dry in the sun. Dried herbs not only provided flavor enhancement in the kitchen, but also were the basis of numerous home remedies.
Home canning and freezing are enjoying a resurgence. These are among the best preservation methods for a wide range of foods, provided the methods are properly carried out. Nevertheless, if you want the true experience of traditional flavors, plan on pickling or drying some of your produce during the coming season.
Next Starving Moon, you will be glad you did.
Showing posts with label food preservation. Show all posts
Showing posts with label food preservation. Show all posts
Saturday, February 2, 2019

Monday, July 27, 2015
Thinking About Tomatoes
It won't be long before every gardener in the Valley is inundated with tomatoes. August is traditionally our best tomato month, but many people are already harvesting early fruit. We have been getting good production from our Chadwick Cherry, Amy's Sugar Gem and Marglobe plants for about a week.
 The Chadwick Cherry and Amy's Sugar Gem plants have been grown in straw bales, after conditioning the bales as described in my book, Idiot's Guide: Straw Bale Gardening. The book is available here. Supported by a sturdy trellis, one plant per bale, these have grown into some of the finest tomato plants we have ever produced. See the photo. This is only two Chadwick Cherry plants, and the trellis is 6'6". The reason they are doing so well is probably the absence of soil-borne fungal diseases on the leaves. Growing in straw bales offers nearly complete protection from this problem. I was pleased to learn that Holly Jones, who is in charge of the kitchen garden at UT Gardens, has had similarly good results with tomatoes in straw bales. I strongly urge anyone interested in heirloom tomatoes to give this technique a try.
We have had a bumper crop of cucumbers and squash. The early cucumber plants came down last week, and the early squash plants are showing signs of exhaustion. We have already made second plantings of these crops for harvest in September and October.
If you grow okra, pick it every day to keep the plants producing. Okra keeps about five days in the refrigerator, and is easy to freeze. Just wipe the pods with a kitchen towel, drop them into freezer containers, label and freeze. If you want to slice the okra, you can do that before freezing, but you can also cut them up after thawing. The choice is entirely yours.
The high temperatures and heavy rainfall we have experienced this month have stressed some plants. Tomatoes, in particular, have shown signs of heat stress. If the leaves on your plants curl upward but look otherwise normal, the plants are heat stressed. Apply mulch early in the morning hours to help keep the soil cool and evenly moist. Also, pay attention to rainfall patterns. A good downpour should suffice for about two days before your plants need irrigation. When in doubt, stick your finger into the soil. If it does not feel moist in the first inch or so, it is time to water. Avoid wetting the foliage, as this encourages fungal diseases. Water the plants deeply and thoroughly. Uneven soil moisture levels lead to cracking and blossom end rot. Be especially careful with watering during hot weather. It is probably best to water late in the day, as the air is cooling off, rather than early in the morning. A drenching followed by hot sun can cause fruits to absorb water so fast they split.
Our present weather pattern favors peppers. Green fruits should be setting on most varieties by now. This would be from plants transplanted around the first of June. Bell peppers and other large-fruited varieties will benefit from thinning. Multiple fruit clusters should be thinned to a single fruit. Use the removed ones in the kitchen. Thinning will lead to larger and more flavorful fruits, and helps prevent branches from breaking under the weight of a heavy fruit set. You can also thin hot peppers if you want prize-winning size fruits, but the hot varieties are so vigorous it is not really necessary. If you do thin, take care. Hot pepper juice can burn your eyes and skin, and the stems have heat just like the fruits do.
Small hot peppers, either green or fully ripe, can be easily preserved in vinegar or sherry. Select a bottle and thoroughly clean it. Place some peppers in the bottom of the bottle, then fill it with sherry or the vinegar of your choice. Apply the cap and set the bottle aside in a cool, dark place for at least two weeks before you use it. The amount of heat will depend upon how many peppers you use. About half a cup of peppers for each cup of liquid will produce a product comparable to commercial hot pepper vinegar. Small fruited peppers work best for this, or you can cut larger peppers into chunks. Always wear plastic gloves when handling hot peppers, and take care not to get the juice in your eyes.

We have had a bumper crop of cucumbers and squash. The early cucumber plants came down last week, and the early squash plants are showing signs of exhaustion. We have already made second plantings of these crops for harvest in September and October.
If you grow okra, pick it every day to keep the plants producing. Okra keeps about five days in the refrigerator, and is easy to freeze. Just wipe the pods with a kitchen towel, drop them into freezer containers, label and freeze. If you want to slice the okra, you can do that before freezing, but you can also cut them up after thawing. The choice is entirely yours.
The high temperatures and heavy rainfall we have experienced this month have stressed some plants. Tomatoes, in particular, have shown signs of heat stress. If the leaves on your plants curl upward but look otherwise normal, the plants are heat stressed. Apply mulch early in the morning hours to help keep the soil cool and evenly moist. Also, pay attention to rainfall patterns. A good downpour should suffice for about two days before your plants need irrigation. When in doubt, stick your finger into the soil. If it does not feel moist in the first inch or so, it is time to water. Avoid wetting the foliage, as this encourages fungal diseases. Water the plants deeply and thoroughly. Uneven soil moisture levels lead to cracking and blossom end rot. Be especially careful with watering during hot weather. It is probably best to water late in the day, as the air is cooling off, rather than early in the morning. A drenching followed by hot sun can cause fruits to absorb water so fast they split.
Our present weather pattern favors peppers. Green fruits should be setting on most varieties by now. This would be from plants transplanted around the first of June. Bell peppers and other large-fruited varieties will benefit from thinning. Multiple fruit clusters should be thinned to a single fruit. Use the removed ones in the kitchen. Thinning will lead to larger and more flavorful fruits, and helps prevent branches from breaking under the weight of a heavy fruit set. You can also thin hot peppers if you want prize-winning size fruits, but the hot varieties are so vigorous it is not really necessary. If you do thin, take care. Hot pepper juice can burn your eyes and skin, and the stems have heat just like the fruits do.
Small hot peppers, either green or fully ripe, can be easily preserved in vinegar or sherry. Select a bottle and thoroughly clean it. Place some peppers in the bottom of the bottle, then fill it with sherry or the vinegar of your choice. Apply the cap and set the bottle aside in a cool, dark place for at least two weeks before you use it. The amount of heat will depend upon how many peppers you use. About half a cup of peppers for each cup of liquid will produce a product comparable to commercial hot pepper vinegar. Small fruited peppers work best for this, or you can cut larger peppers into chunks. Always wear plastic gloves when handling hot peppers, and take care not to get the juice in your eyes.
Tuesday, July 14, 2015
More Ways to Save Summer
Jerry and I will have a table at the UT Gardens Farmer's Market on Wednesday, July 15. We will be there to answer gardening questions from 4:00 to 7:00 PM. There will be food, music, and of course multiple vendors of local produce and other farm products. The market is pet and kid friendly, so why not bring everyone and join us? Free parking near the entrance to UT Gardens.
 Important Note: The UT Gardens Farmer's Market always has a special table where you can leave excess produce to be donated to Second Harvest. In our case, we have a bag of cucumbers. I have made all the pickles we will use until next season, and we still have plenty coming along. This is a great way to deal with all that summer squash or whatever abundance your garden has been blessed with. Some people even buy extra vegetables from the vendors, just to donate to this worthy effort.
One thing I always look for at the summer markets is fresh local fruit. Whether it is wild blackberries, peaches, or something else, the flavor and quality of locally grown, naturally ripened fruit is impossible to obtain in fruit shipped here from California. One of the best ways to take advantage of seasonal fruit is to use the simple, time-honored technique of making preserves. Of all the sweet treats you can make from fresh fruit, preserves are the simplest. They will also provide you with the greatest number of options when using the finished product.
You will need a kitchen scale for this recipe.
Universal Recipe for Fruit Preserves
1 pound fresh fruit
12 ounces sugar
Prepare the fruit as you would for eating it fresh. That is, peel, pit or stem fruits as needed and cut larger fruits, like peaches, into bite size pieces. To prevent darkening, use a commercial product such as Fruit Fresh(TM) according to the label directions. Place the prepared fruit and the sugar in a large, heavy bottomed saucepan. Stir the fruit and sugar together, bruising the fruit slightly and allowing some juice to be released. Don't get carried away with this. You want to retain the shape of the fruit as much as possible. Set the pan over medium heat and bring it to a simmer, stirring occasionally. Watch carefully and regulate the heat so the mixture does not scorch. As soon as the boiling point is reached, remove the pan from the heat, cover, and allow it to cool to room temperature. Leave it sitting overnight, and do not open the lid. The following day, you should have slightly translucent fruit floating in flavored syrup. You can store the preserves in the refrigerator for a month, or can them. Using a slotted spoon, transfer the fruit to half-pint canning jars. Ladle the syrup over the fruit, leaving 1/4 inch head space. (Store any additional syrup in the refrigerator. It is delicious on ice cream or to flavor whipped cream, etc.) Wipe the rim of the jar with a damp kitchen towel to ensure a good seal. Apply lids and bands and process the jars in a boiling water bath for 10 minutes, or 15 minutes if you live above 1000 feet elevation.
Preserves can be used as a dessert topping, or can be mixed with other ingredients depending upon your needs. For example, peach preserves can be thickened with cornstarch paste to use as pie filling. I have made cherry preserves into a killer barbecue sauce, The possibilities are limited only by your imagination. Make a batch of preserves and enjoy summer flavor all winter long.
One thing I always look for at the summer markets is fresh local fruit. Whether it is wild blackberries, peaches, or something else, the flavor and quality of locally grown, naturally ripened fruit is impossible to obtain in fruit shipped here from California. One of the best ways to take advantage of seasonal fruit is to use the simple, time-honored technique of making preserves. Of all the sweet treats you can make from fresh fruit, preserves are the simplest. They will also provide you with the greatest number of options when using the finished product.
You will need a kitchen scale for this recipe.
Universal Recipe for Fruit Preserves
1 pound fresh fruit
12 ounces sugar
Prepare the fruit as you would for eating it fresh. That is, peel, pit or stem fruits as needed and cut larger fruits, like peaches, into bite size pieces. To prevent darkening, use a commercial product such as Fruit Fresh(TM) according to the label directions. Place the prepared fruit and the sugar in a large, heavy bottomed saucepan. Stir the fruit and sugar together, bruising the fruit slightly and allowing some juice to be released. Don't get carried away with this. You want to retain the shape of the fruit as much as possible. Set the pan over medium heat and bring it to a simmer, stirring occasionally. Watch carefully and regulate the heat so the mixture does not scorch. As soon as the boiling point is reached, remove the pan from the heat, cover, and allow it to cool to room temperature. Leave it sitting overnight, and do not open the lid. The following day, you should have slightly translucent fruit floating in flavored syrup. You can store the preserves in the refrigerator for a month, or can them. Using a slotted spoon, transfer the fruit to half-pint canning jars. Ladle the syrup over the fruit, leaving 1/4 inch head space. (Store any additional syrup in the refrigerator. It is delicious on ice cream or to flavor whipped cream, etc.) Wipe the rim of the jar with a damp kitchen towel to ensure a good seal. Apply lids and bands and process the jars in a boiling water bath for 10 minutes, or 15 minutes if you live above 1000 feet elevation.
Preserves can be used as a dessert topping, or can be mixed with other ingredients depending upon your needs. For example, peach preserves can be thickened with cornstarch paste to use as pie filling. I have made cherry preserves into a killer barbecue sauce, The possibilities are limited only by your imagination. Make a batch of preserves and enjoy summer flavor all winter long.
Tuesday, June 23, 2015
Saving Summer
If you have a vegetable garden, chances are you are experiencing an over-abundance of one or more of your crops. Vegetable varieties can be amazingly productive, and a favorable season can spur any of them to higher levels.
Take the case of our French filet beans this year. Also called "haricots verts," these are green beans bred to be picked when they are about 3/16 of an inch in diameter, and eaten with minimal preparation. If you try to substitute immature snap beans, like Blue Lake or Kentucky Wonder, you will be disappointed in the lack of flavor and mushy texture. On the other hand, if you try to cook full size green beans as recommended for filet beans (as I recently experienced in an otherwise excellent restaurant) they will be so tough as to be inedible. If you find filet beans in the market, they are guaranteed to be expensive, because demand is small compared to other types of beans, and the yield, in terms of pounds-per-unit-effort for the grower, is low.
In the backyard garden, however, a row of filet beans can easily produce more beans than you will care to eat fresh. We have already harvested about five pounds of them, and I have begun to run out of recipes, not to mention simply tiring of them. I know from previous experience they do not freeze well. The tender texture does not lend itself to freezing. My efforts at preserving them this way resulted in a mushy, olive-colored product with very little remaining flavor. I threw them into the compost bin.
When I checked with the National Center for Home Food Preservation, I found a lot of great ideas for what to do with summer produce, but, alas, nothing for haricots verts. If you are new to home canning, this web site has a wealth of essential information and dozens of laboratory tested recipes. I have found some of the recipes lifted verbatim and copied without attribution on other web sites. Why not go directly to the experts?
 Imagine my delight, then, when I discovered a recipe for making pickles out of filet beans on a British food site. It called for a few exotic ingredients that would have entailed a trip out to West Knoxville to obtain, so I tweaked the recipe a bit.
Before I get to the actual recipe, however, I will offer a tip for saving money on summer canning projects. Those herbs and spices called for in just about every recipe for pickles can get expensive. Instead of getting the little bottles from the grocery store, look for bulk spices at Three Rivers Market or your favorite specialty retailer. I was able to buy four times the amount of mustard seed, for example, for half the price of the McCormick brand in the little jar, a savings of about 85 percent.
Take the case of our French filet beans this year. Also called "haricots verts," these are green beans bred to be picked when they are about 3/16 of an inch in diameter, and eaten with minimal preparation. If you try to substitute immature snap beans, like Blue Lake or Kentucky Wonder, you will be disappointed in the lack of flavor and mushy texture. On the other hand, if you try to cook full size green beans as recommended for filet beans (as I recently experienced in an otherwise excellent restaurant) they will be so tough as to be inedible. If you find filet beans in the market, they are guaranteed to be expensive, because demand is small compared to other types of beans, and the yield, in terms of pounds-per-unit-effort for the grower, is low.
In the backyard garden, however, a row of filet beans can easily produce more beans than you will care to eat fresh. We have already harvested about five pounds of them, and I have begun to run out of recipes, not to mention simply tiring of them. I know from previous experience they do not freeze well. The tender texture does not lend itself to freezing. My efforts at preserving them this way resulted in a mushy, olive-colored product with very little remaining flavor. I threw them into the compost bin.
When I checked with the National Center for Home Food Preservation, I found a lot of great ideas for what to do with summer produce, but, alas, nothing for haricots verts. If you are new to home canning, this web site has a wealth of essential information and dozens of laboratory tested recipes. I have found some of the recipes lifted verbatim and copied without attribution on other web sites. Why not go directly to the experts?

Before I get to the actual recipe, however, I will offer a tip for saving money on summer canning projects. Those herbs and spices called for in just about every recipe for pickles can get expensive. Instead of getting the little bottles from the grocery store, look for bulk spices at Three Rivers Market or your favorite specialty retailer. I was able to buy four times the amount of mustard seed, for example, for half the price of the McCormick brand in the little jar, a savings of about 85 percent.
Pickled Haricots
Verts
½ pound haricots verts
⅓ cup
Champagne vinegar
⅓ cup
water
2 lemons
1 tablespoon whole black peppercorns
1 teaspoon herbes de Provence
½ teaspoon sea salt
1 teaspoon sugar
1 teaspoon capers, drained
½ teaspoon chili flakes
½ teaspoon mustard seed
Wash a pint jar in hot, soapy water. Rinse well, and place the jar in a 180F oven while you prepare the beans and pickling liquid. Rinse
and drain the beans. Bring a large pot of water to a rolling boil. Drop in the beans and blanch them 3 minutes. Drain the beans into a colander, rinse under cold water and plunge the colander into a bowl of ice water. They should be
crisp and bright green. Arrange the beans on a tray so that all are oriented in the same direction. Reserve.
Remove the zest from the lemons and juice them, reserving the zest and juice separately. You should have about ⅓ cup juice. Strain out any seeds.
In a
small nonreactive saucepan, bring the vinegar, water, lemon zest, peppercorns,
herbes de Provence, salt, and sugar to a boil. Decrease the heat and simmer for
10 minutes.
Pack the beans upright into the jar, taking care not to break them. This is easier if you start with the jar on its side, and if you use a wide mouth jar. Sprinkle the chili flakes, mustard seed, and capers over the beans. Pour the hot vinegar mixture over the beans, top with the lemon juice,
and put a lid on the jar. Allow the jar to cool to room temperature, then place it in the refrigerator. Let the beans rest at least one week before using. They will keep
for two months if unopened and refrigerated. After opening, use the beans within two weeks.
Saturday, September 6, 2014
Harvest Time
September is the month of the Harvest Moon (which arrives on Monday the 8th) and with good reason. From late tomatoes and squash to fall favorites like pumpkins to"second spring" lettuce and scallions, in September the Tennessee Valley has it all. No wonder the Tennessee Valley Fair has traditionally been held in September. If you are interested in agriculture at any level, the fair is worth a visit. There will be exhibits of home canning, various cooking demonstrations, horticulture exhibits, fruit and vegetable competitions, and showings of all kinds of domestic animals, from rabbits to cattle. The fair is a great starting place if you think, for example, that you might like to have a few chickens. You can get up close and personal with numerous breeds. Take advantage of the opportunity to talk to the exhibitors, too. You will never find better advice.
September also marks the time of the big Fall Plant Sale at UT Gardens. If you are looking for special plants for your landscape, you can find some great choices at the Fall Plant Sale. It begins at 9:00 AM, Saturday, September 27th. UT Gardens Members get a sneak preview on Friday, September 26.
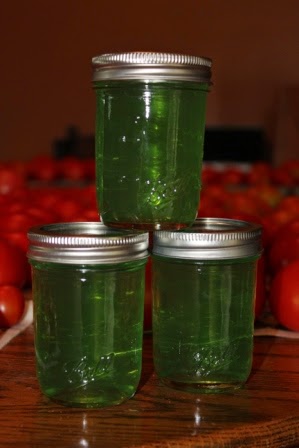 You still have time to plant fall greens. Members of the mustard family, turnips, bak choy, and arugula, will all mature a crop from seeds planted now. We have about a month before we can reasonably expect frost, and two months before a hard freeze. Fall greens can take a bit of frost, so plant away. The warm soil will result in speedy germination.
This is also the month for warm season herbs in great abundance. If you find yourself with an excess, make an herb jelly. Here is a master recipe that works with mint, basil, tarragon, lavender, rosemary and probably most other herbs.
Herb Jelly
2 ounces herb leaves, stripped from the stems (about 1 quart loosely packed)
2 1/4 cups boiling water
2 tablespoons lemon juice
3 cups granulated sugar
1 drop food coloring (optional)
3 ounces (one pouch from a 6-ounce box) liquid fruit pectin
Have ready four half pint canning jars with lids. I like to keep them warm in the water bath canner.
Place the herb leaves in a saucepan and pour the boiling water over them. Stir to thoroughly wilt all the leaves, crushing some with the spoon to release the aromatic oils. Bring the liquid back to a boil, cover, remove from the heat and allow to steep for 10 minutes. Strain through a fine sieve. Measure out 1 2/3 cups of the herb infusion and place in a large pot. (Use any remaining to flavor iced tea.)
Add the lemon juice, sugar and food coloring (if used) to the pot, place it over medium-high heat and bring to a boil, stirring constantly. When the liquid is at a rolling boil that does not stir down, add the pectin all at once. Continue boiling and stirring for one minute.
Working quickly, skim any foam from the top of the jelly, using a large metal spoon. Ladle the jelly into the hot jars, leaving 1/4 inch head space, apply caps, and process for 15 minutes in a boiling water bath.
Herb jelly can be used as a condiment on roasted meats, and is delicious when served atop cream cheese on crackers.
September also marks the time of the big Fall Plant Sale at UT Gardens. If you are looking for special plants for your landscape, you can find some great choices at the Fall Plant Sale. It begins at 9:00 AM, Saturday, September 27th. UT Gardens Members get a sneak preview on Friday, September 26.
This is also the month for warm season herbs in great abundance. If you find yourself with an excess, make an herb jelly. Here is a master recipe that works with mint, basil, tarragon, lavender, rosemary and probably most other herbs.
Herb Jelly
2 ounces herb leaves, stripped from the stems (about 1 quart loosely packed)
2 1/4 cups boiling water
2 tablespoons lemon juice
3 cups granulated sugar
1 drop food coloring (optional)
3 ounces (one pouch from a 6-ounce box) liquid fruit pectin
Have ready four half pint canning jars with lids. I like to keep them warm in the water bath canner.
Place the herb leaves in a saucepan and pour the boiling water over them. Stir to thoroughly wilt all the leaves, crushing some with the spoon to release the aromatic oils. Bring the liquid back to a boil, cover, remove from the heat and allow to steep for 10 minutes. Strain through a fine sieve. Measure out 1 2/3 cups of the herb infusion and place in a large pot. (Use any remaining to flavor iced tea.)
Add the lemon juice, sugar and food coloring (if used) to the pot, place it over medium-high heat and bring to a boil, stirring constantly. When the liquid is at a rolling boil that does not stir down, add the pectin all at once. Continue boiling and stirring for one minute.
Working quickly, skim any foam from the top of the jelly, using a large metal spoon. Ladle the jelly into the hot jars, leaving 1/4 inch head space, apply caps, and process for 15 minutes in a boiling water bath.
Herb jelly can be used as a condiment on roasted meats, and is delicious when served atop cream cheese on crackers.
Saturday, August 16, 2014
6 Great Things To Do With Tomatoes
If you are like us, this time of year you are inundated with tomatoes. We have had an especially good year, both for the heirlooms and hybrids we grew. Our outstanding favorite among the hybrids is Whopper, developed by Park Seed Co. in South Carolina. It is a determinate tomato, but it branches profusely at the base, forming a "bush" about four feet in diameter. It definitely needs a sturdy wire cage to contain its exuberance. It also produces loads of tasty tomatoes, of uniform size and with small cores, the ideal tomato, in our view, for home canning. Check out the photo. The majority of the fruits are like these, about 8 ounces each. They are also delicious on a sandwich. Here are seven things to do with the seasonal abundance of tomatoes.
 1. Freeze Them
Tomatoes freeze easily. Just wash, core and cut them in halves or quarters. Drop into freezer containers and place in the freezer. When thawed, the skins will slip right off and the tomatoes can be used for soup or to make tomato sauce.
2. Can Them
Tomatoes are easy to can because of their acidity, which helps prevent spoilage. You need some special equipment for canning, but the investment is small and the equipment will last many seasons. A large water bath canner with a rack to hold the jars is the main item. If you invest in a jar lifter, canning funnel, and a pair of stainless steel tongs, your canning experience will go much more smoothly.
For instructions on canning tomatoes, visit the web site of the National Center for Home Food Preservation at the University of Georgia. There you will also find instructions and recipes for many other home canned foods.
3. Juice Them
Tomato juice is canned in exactly the same way as whole tomatoes. A gallon of cored, quartered tomatoes will yield about a half gallon of juice. Tomato juice can be seasoned with small amounts of salt, sugar or spices, like garlic powder or black pepper. It is worth noting that some upscale bars are serving a bloody Mary made with heirloom tomato juice.
4. Sauce Them
Skin, core and chop a couple of quarts of tomatoes. Place them in a saucepan, bring to a simmer and cook, stirring frequently, for 20 minutes. Press through a sieve to remove the seeds. Return the tomato sauce to the heat, add you favorite herbs, a big pinch of salt and some chopped onions, and cook slowly, stirring frequently, until the sauce is thickened. Toss with pasta or use on pizza. Alternatively, cool the sauce to room temperature, transfer to a suitable container, and freeze.
5. Make Stewed Tomatoes
Stewed tomatoes were a popular side dish in the Nineteenth and early Twentieth Centuries, when long cooking was thought to render vegetables more healthful. Peel and core tomatoes and cut them into chunks. Place in a saucepan, bring to a simmer, and cook 15 minutes. Season to taste with salt, pepper and a little sugar. Cool to room temperature and store, covered, in the refrigerator for a week.
6. Make Tomato Pudding
If you happen to have any leftover stewed tomatoes, you can make them into tomato pudding. Oil a baking dish, and line the bottom with stale bread. You can use cornbread, biscuits, yeast bread, or sourdough. Each will give the dish its own character. Break the bread into chunks about the size of a grape. You want a layer about an inch deep on the bottom of the dish. Top the bread with stewed tomatoes, adding a little more salt, sugar and pepper. If you have enough tomatoes, repeat with a second layer of bread, again topping with stewed tomatoes. Sprinkle the top with grated cheese and allow the dish to sit at room temperature for a half hour, to allow the bread to soak up some of the tomato juice. Place in a preheated 350 degree oven for 30 minutes, or until the top is light brown and the edges are bubbly. Serve warm or at room temperature. This basic recipe can be varied endlessly with different seasonings and additions. That is why is was so popular with farm wives, like my grandmother, a century ago.
To Remove Skins
To skin tomatoes, bring a large pot of water to a boil. Select and wash the tomatoes. Using a serrated knife, cut an "X" into the blossom end, cutting just through the skin. Drop a few tomatoes into the boiling water. After 20-30 seconds, remove them with a slotted spoon and transfer to a big bowl of cold water. You will see the skins split immediately, if they have not already. The skin will now easily slip off. Core the tomatoes, transfer them to a bowl, and repeat the process until you have peeled all you need.
Tomatoes freeze easily. Just wash, core and cut them in halves or quarters. Drop into freezer containers and place in the freezer. When thawed, the skins will slip right off and the tomatoes can be used for soup or to make tomato sauce.
2. Can Them
Tomatoes are easy to can because of their acidity, which helps prevent spoilage. You need some special equipment for canning, but the investment is small and the equipment will last many seasons. A large water bath canner with a rack to hold the jars is the main item. If you invest in a jar lifter, canning funnel, and a pair of stainless steel tongs, your canning experience will go much more smoothly.
For instructions on canning tomatoes, visit the web site of the National Center for Home Food Preservation at the University of Georgia. There you will also find instructions and recipes for many other home canned foods.
3. Juice Them
Tomato juice is canned in exactly the same way as whole tomatoes. A gallon of cored, quartered tomatoes will yield about a half gallon of juice. Tomato juice can be seasoned with small amounts of salt, sugar or spices, like garlic powder or black pepper. It is worth noting that some upscale bars are serving a bloody Mary made with heirloom tomato juice.
4. Sauce Them
Skin, core and chop a couple of quarts of tomatoes. Place them in a saucepan, bring to a simmer and cook, stirring frequently, for 20 minutes. Press through a sieve to remove the seeds. Return the tomato sauce to the heat, add you favorite herbs, a big pinch of salt and some chopped onions, and cook slowly, stirring frequently, until the sauce is thickened. Toss with pasta or use on pizza. Alternatively, cool the sauce to room temperature, transfer to a suitable container, and freeze.
5. Make Stewed Tomatoes
Stewed tomatoes were a popular side dish in the Nineteenth and early Twentieth Centuries, when long cooking was thought to render vegetables more healthful. Peel and core tomatoes and cut them into chunks. Place in a saucepan, bring to a simmer, and cook 15 minutes. Season to taste with salt, pepper and a little sugar. Cool to room temperature and store, covered, in the refrigerator for a week.
6. Make Tomato Pudding
If you happen to have any leftover stewed tomatoes, you can make them into tomato pudding. Oil a baking dish, and line the bottom with stale bread. You can use cornbread, biscuits, yeast bread, or sourdough. Each will give the dish its own character. Break the bread into chunks about the size of a grape. You want a layer about an inch deep on the bottom of the dish. Top the bread with stewed tomatoes, adding a little more salt, sugar and pepper. If you have enough tomatoes, repeat with a second layer of bread, again topping with stewed tomatoes. Sprinkle the top with grated cheese and allow the dish to sit at room temperature for a half hour, to allow the bread to soak up some of the tomato juice. Place in a preheated 350 degree oven for 30 minutes, or until the top is light brown and the edges are bubbly. Serve warm or at room temperature. This basic recipe can be varied endlessly with different seasonings and additions. That is why is was so popular with farm wives, like my grandmother, a century ago.
To Remove Skins
To skin tomatoes, bring a large pot of water to a boil. Select and wash the tomatoes. Using a serrated knife, cut an "X" into the blossom end, cutting just through the skin. Drop a few tomatoes into the boiling water. After 20-30 seconds, remove them with a slotted spoon and transfer to a big bowl of cold water. You will see the skins split immediately, if they have not already. The skin will now easily slip off. Core the tomatoes, transfer them to a bowl, and repeat the process until you have peeled all you need.
Saturday, August 9, 2014
Preserving Summer's Bounty
If you are like most gardeners in the Tennessee Valley, you will have a glut of produce during the month of August. We have been canning and freezing like mad. Tomatoes, corn, vegetable soup mix, and beans have been our primary focus.
Today, however, I wanted to share our discovery regarding one of the best ways to preserve authentic summer flavor without too much work. The secret: frozen gazpacho. The recipe can easily be double or tripled.
John's Frozen Gazpacho Base
1 green pepper, trimmed and seeded, coarsely chopped
4 pickling cucumbers, trimmed and seeded, coarsely chopped
6 firm ripe tomatoes, cored and coarsely chopped
1 cup chopped onions
2 cloves garlic, peeled
1/2 cup chopped fresh parsley
18 large fresh basil leaves
1 tablespoon fresh tarragon leaves
1/4 cup Sherry vinegar, or other vinegar or lemon juice
1 tablespoon salt
1 tablespoon paprika
Working in batches, chop the vegetables and herbs in a food processor. The mixture should be a bit chunky. Do not liquefy everything. You can also do the chopping by hand. Transfer everything to a large bowl and add the vinegar, salt and paprika. Stir well to combine. Chill overnight, covered.
Transfer the soup base to freezer containers, label and place in the freezer.
To serve, allow the soup base to thaw overnight in the refrigerator. Combine with an equal volume of chilled stock or water. (More or less, to achieve the consistency you prefer.) Serve cold, garnished with croutons, sour cream, and chopped scallions.
This makes a delightful substitute for a salad course. The bright flavors are a welcome change from the winter taste of supermarket produce.
Today, however, I wanted to share our discovery regarding one of the best ways to preserve authentic summer flavor without too much work. The secret: frozen gazpacho. The recipe can easily be double or tripled.
John's Frozen Gazpacho Base
1 green pepper, trimmed and seeded, coarsely chopped
4 pickling cucumbers, trimmed and seeded, coarsely chopped
6 firm ripe tomatoes, cored and coarsely chopped
1 cup chopped onions
2 cloves garlic, peeled
1/2 cup chopped fresh parsley
18 large fresh basil leaves
1 tablespoon fresh tarragon leaves
1/4 cup Sherry vinegar, or other vinegar or lemon juice
1 tablespoon salt
1 tablespoon paprika
Working in batches, chop the vegetables and herbs in a food processor. The mixture should be a bit chunky. Do not liquefy everything. You can also do the chopping by hand. Transfer everything to a large bowl and add the vinegar, salt and paprika. Stir well to combine. Chill overnight, covered.
Transfer the soup base to freezer containers, label and place in the freezer.
To serve, allow the soup base to thaw overnight in the refrigerator. Combine with an equal volume of chilled stock or water. (More or less, to achieve the consistency you prefer.) Serve cold, garnished with croutons, sour cream, and chopped scallions.
This makes a delightful substitute for a salad course. The bright flavors are a welcome change from the winter taste of supermarket produce.
Saturday, February 1, 2014
Seed Starting Time
February is here already, and it is time to start seeds for early spring transplants. Broccoli, cabbage, cauliflower, celery, and cool season herbs should all be started between now and February 15, so they will be ready to transplant during the last two weeks of March.
 I plan to start celery, cilantro, parsley and scallions this weekend. These are all slow-growing when small, and spring crops need to be planted early so they can mature before hot weather sets in. This year, I am testing a new LED lighting system from Italy that has the potential to revolutionize indoor growing. The accompanying photo shows the unit, along with my makeshift capillary mat system for watering the pots. Each pot gets planted this weekend with a different variety of seed, and I will be keeping tabs on the progress of the plants every week. The LED unit only consumes 20 watts of electricity, but provides as much plant illumination as a 250-watt metal halide lamp. It should effectively illuminate at 20 by 20-inch area, sufficient for two standard nursery flats.
We are harvesting Meyer lemons this month. This tree, which is now in its second year in my possession, has been the most productive of the indoor citrus we have tried. If you have never grown citrus, it is certainly worth a try. Use a container that you won't mind lugging in an out, because you have to protect the trees from temperatures below about 35 degrees. An unheated garage with a south facing window offers the best winter home, unless of course you have a greenhouse. Citrus has enjoyed increasing popularity with home gardeners in recent years. You can find a great selection of trees, along with potting mix, fertilizer and advice, at Stanley's Greenhouses.
Meyer lemons are sweeter, larger and juicier than standard lemons, and botanically are actually more closely related to tangerine. The pith of Meyer lemons is not bitter, so the entire fruit can be used. It is a popular choice for making preserved lemons, a staple of Middle Eastern cuisine. Here's a typical, simple recipe:
Preserved Meyer Lemons
2 Meyer lemons
1 tablespoon plus 2 teaspoons salt
1 small bay leaf
1 whole clove
2 whole coriander seeds
2 black peppercorns
lemon juice, from two additional Meyer lemons
Wash the lemons well, trim off the ends, and slice lengthwise into quarters, not cutting completely through one end, so they lemon opens up like a flower. Sprinkle the cut surfaces with some of the salt, close the lemons up and place them in a small jar, after adding about half the remaining salt to the bottom of the jar. Drop in the spices, sprinkle the rest of the salt over all, and add enough fresh lemon juice to cover. Cap the jar and store in the refrigerator for up to 6 months. Wait about a month before opening, to allow the flavor to develop.
We are harvesting Meyer lemons this month. This tree, which is now in its second year in my possession, has been the most productive of the indoor citrus we have tried. If you have never grown citrus, it is certainly worth a try. Use a container that you won't mind lugging in an out, because you have to protect the trees from temperatures below about 35 degrees. An unheated garage with a south facing window offers the best winter home, unless of course you have a greenhouse. Citrus has enjoyed increasing popularity with home gardeners in recent years. You can find a great selection of trees, along with potting mix, fertilizer and advice, at Stanley's Greenhouses.
Meyer lemons are sweeter, larger and juicier than standard lemons, and botanically are actually more closely related to tangerine. The pith of Meyer lemons is not bitter, so the entire fruit can be used. It is a popular choice for making preserved lemons, a staple of Middle Eastern cuisine. Here's a typical, simple recipe:
Preserved Meyer Lemons
2 Meyer lemons
1 tablespoon plus 2 teaspoons salt
1 small bay leaf
1 whole clove
2 whole coriander seeds
2 black peppercorns
lemon juice, from two additional Meyer lemons
Wash the lemons well, trim off the ends, and slice lengthwise into quarters, not cutting completely through one end, so they lemon opens up like a flower. Sprinkle the cut surfaces with some of the salt, close the lemons up and place them in a small jar, after adding about half the remaining salt to the bottom of the jar. Drop in the spices, sprinkle the rest of the salt over all, and add enough fresh lemon juice to cover. Cap the jar and store in the refrigerator for up to 6 months. Wait about a month before opening, to allow the flavor to develop.
Saturday, August 10, 2013
Gumbo!
Is there a more quintessentially Southern dish than gumbo? USA Today this week ran a feature on Southern foods that tourists should not miss. Barbecue and fried green tomatoes made the list, but so did some questionable entries, like tamales. But they left out gumbo. Given that okra is difficult to grow north of the Mason Dixon line, you would think the traditional stew of meat, veggies and tomatoes would have made the cut.
 "Gumbo" is thought to derive from the African word for okra, something like "quingombo." There is no doubt that the vegetable made its way into the Southern cook's repertoire via Africans who were brought here against their will in the 18th Century. It is a member of the hibiscus family, a fact revealed when the large, showy flowers open for a single day, typically as the weather gets really hot and muggy in late July or early August. Okra will not germinate in cool soil, so gardeners typically wait until Memorial Day to plant the BB-like seeds. Soaking them overnight helps to insure complete germination, and they will fairly leap from the ground within a few days of planting. They need little in the way of attention once they are about six inches tall. Irrigation is necessary only now and then, and too much fertilizer will result in large plants with few blooms.
Once the pods begin to appear, the plants will continue producing non-stop until the first hard frost. It is important to pick each pod as soon as they become large enough at 3-4 inches. Leaving pods to mature on the plant will reduce subsequent yield. Store the harvest at room temperature and use within three days. If dark spots begin to show, it is over the hill. Individual plants will bear from one to three usable pods every day.
Cooks who find themselves with an over-abundance of okra, a not uncommon condition, can easily preserve the harvest by freezing. Simply wipe whole pods with a kitchen cloth to remove any foreign matter, drop them into containers and freeze. Blanching is not necessary. Don't bother to cut or trim the pods. You can do that after you thaw them later. Okra also makes great pickles. Follow the recipe for raw pack dill pickles on our In The Kitchen page substituting okra for the cucumbers. Do not cut the okra, leave pods whole.
Some folks say they don't like okra because it has a slimy texture. This effect results from pectins and complex sugars within the pod, and can be avoided by several techniques. First, do not wash the pods, always wipe clean with a kitchen cloth or paper towels. Otherwise, the added water will activate the gummy contents as soon as you cut the pod open. Second, cooking okra in hot oil or in a dry skillet will prevent the juice from turning slimy. Third, acid also inactivates the slime components, so pickled okra loses this tendency. Tomatoes also reduce the effect.
What you want to avoid is dropping raw okra directly into a liquid that is neither scalding hot nor acidic, like soup stock. This will result in thickening the liquid, and is probably how the stew, gumbo, was originally thickened. French and Native American influences on gumbo, however, have led to different methods of thickening.
Native Americans no doubt introduced the use of dried young leaves of the sassafrass tree as a thickening agent. This is filé (pronounced FEEL-ay) powder. Gumbo thickened at the end of the cooking process by the addition of a bit of filé powder is often called "filé gumbo."
The other thickening technique, and the most common in my experience, was contributed by the French. Cooking fat and flour together to produce a roux, as is done with many types of sauces and gravies, allows the cook to control not only the thickness of the gumbo, but also its flavor. Depending upon how long the roux is cooked, it gives a different character to the gumbo. Longer cooking produces a progressively darker roux that loses thickening power as it increases in robustness of flavor. This can provide many opportunities for experimentation and customization. Gumbo can truly be any cook's special, personal creation.
Here is a generalized recipe for gumbo that can be varied endlessly, depending upon what you have on hand and what is in season. You can substitute any protein for the shrimp and sausage, keeping the total amount to about one cup. Any type of stock will work, also. Keep the "trinity" of onions, green peppers and celery, however, for true Creole flavor, along with the tomatoes.

Once the pods begin to appear, the plants will continue producing non-stop until the first hard frost. It is important to pick each pod as soon as they become large enough at 3-4 inches. Leaving pods to mature on the plant will reduce subsequent yield. Store the harvest at room temperature and use within three days. If dark spots begin to show, it is over the hill. Individual plants will bear from one to three usable pods every day.
Cooks who find themselves with an over-abundance of okra, a not uncommon condition, can easily preserve the harvest by freezing. Simply wipe whole pods with a kitchen cloth to remove any foreign matter, drop them into containers and freeze. Blanching is not necessary. Don't bother to cut or trim the pods. You can do that after you thaw them later. Okra also makes great pickles. Follow the recipe for raw pack dill pickles on our In The Kitchen page substituting okra for the cucumbers. Do not cut the okra, leave pods whole.
Some folks say they don't like okra because it has a slimy texture. This effect results from pectins and complex sugars within the pod, and can be avoided by several techniques. First, do not wash the pods, always wipe clean with a kitchen cloth or paper towels. Otherwise, the added water will activate the gummy contents as soon as you cut the pod open. Second, cooking okra in hot oil or in a dry skillet will prevent the juice from turning slimy. Third, acid also inactivates the slime components, so pickled okra loses this tendency. Tomatoes also reduce the effect.
What you want to avoid is dropping raw okra directly into a liquid that is neither scalding hot nor acidic, like soup stock. This will result in thickening the liquid, and is probably how the stew, gumbo, was originally thickened. French and Native American influences on gumbo, however, have led to different methods of thickening.
Native Americans no doubt introduced the use of dried young leaves of the sassafrass tree as a thickening agent. This is filé (pronounced FEEL-ay) powder. Gumbo thickened at the end of the cooking process by the addition of a bit of filé powder is often called "filé gumbo."
The other thickening technique, and the most common in my experience, was contributed by the French. Cooking fat and flour together to produce a roux, as is done with many types of sauces and gravies, allows the cook to control not only the thickness of the gumbo, but also its flavor. Depending upon how long the roux is cooked, it gives a different character to the gumbo. Longer cooking produces a progressively darker roux that loses thickening power as it increases in robustness of flavor. This can provide many opportunities for experimentation and customization. Gumbo can truly be any cook's special, personal creation.
Here is a generalized recipe for gumbo that can be varied endlessly, depending upon what you have on hand and what is in season. You can substitute any protein for the shrimp and sausage, keeping the total amount to about one cup. Any type of stock will work, also. Keep the "trinity" of onions, green peppers and celery, however, for true Creole flavor, along with the tomatoes.
John’s Creole Style Gumbo
8 servings
1/2 pound small raw shrimp
1/2 pound Andouille sausage (can substitute kielbasa), cut in 1/4" rounds
1/4 cup vegetable oil or bacon drippings
1/4 cup all purpose flour
1/4 cup chopped onions
1/4 cup chopped green bell peppers
1/4 cup chopped celery
1 tablespoon vegetable oil
1 cup sliced okra
1/4 cup peeled, seeded and chopped fresh tomatoes
2 tablespoons minced garlic
1 teaspoon Creole Seasoning (recipe follows)
freshly ground black pepper
3 bay leaves
3 cups chicken or seafood stock, fresh or canned
1/2 teaspoon Worchestershire sauce
hot sauce, such as Tabasco
3/4 teaspoon fresh thyme leaves
1 teaspoon chopped fresh oregano
1 teaspoon shredded fresh basil leaves
cooked rice
chopped green onions
hard boiled eggs
Peel and devein the shrimp. Refrigerate. In a heavy cast iron skillet, heat 1/4 cup of vegetable oil over medium high heat. Fry the Andouille sausage until it is lightly browned, remove with a slotted spoon, and drain on paper towels. Reserve. Pour the fat into a heatproof measuring cup, discarding all but 1/4 cup. Return the fat to the skillet, add the flour, and stir continuously with a wire whisk until the roux is the color of milk chocolate, scraping up the browned bits on the bottom of the pan and incorporating them into the roux. Take care not to splatter the roux on your skin! It is extremely hot. When the roux is the right color, add the onions, peppers and celery, turn off the heat, and continue stirring until the mixture stops sizzling. Set aside.
In a large stew pot, heat 1 tablespoon of vegetable oil until it ripples. Add the okra, and stir fry until most of the okra has brown spots. Add the tomatoes, garlic, Creole seasoning, a few grinds of pepper, and the bay leaves. Stir fry for one minute. Add the stock, Worchestershire sauce, a few drops of hot sauce, and the fresh herbs. Bring to a simmer, then add the reserved roux-vegetable mixture by spoonfuls, stirring with each addition. The stew should become slightly thickened. Return the stew to a gentle simmer. Add the reserved sausage and the shrimp, and cook just until the shrimp turn pink, about 2 or 3 minutes. Taste carefully and adjust the seasoning
Serve the gumbo over cooked rice, garnished with chopped green onions and hard-boiled eggs. Pass additional hot sauce. All you need is a salad for a complete meal.
Creole Seasoning Mix
1-1/2 teaspoons paprika
1 teaspoon onion powder
1 teaspoon garlic powder
1 teaspoon salt
1/2 teaspoon ground black pepper
1/2 teaspoon ground white pepper
Combine all ingredients and store tightly sealed in a cool, dark place for up to one year.
Friday, January 4, 2013
New Years Resolutions for Urban Homesteaders
Please join me again tomorrow morning at 8:00 on WNOX-FM 100.3 for "Garden Talk" with Dr. Sue Hamilton, Director of UT Gardens. I am filling in for the regular co-host, Andy Pulte. We will be taking phone calls from listeners, so give us a call!
Win a Free Subscription to Tennessee Gardener!
Email me with your best garden tip for 2013 and win a free one-year subscription to Tennessee Gardener. All entries must be received by January 31, 2013. A total of 3 winners will be announced in early February.
Popularity of Urban Homesteading Increasing
Our numbers are growing. Every day, as I drive around the area, I see evidence of the popularity of homegrown food and backyard farming. Gardens appear where none were last year. Tomatoes line the front walk, where petunias once bloomed. Herbs spill from fourth story balcony rails. With the launch of our Sustainable Suburbs project in 2013, we hope to introduce more people to the techniques they need to live in a saner, greener, more sustainable way, without giving up the comforts of life in the suburbs. The way we see it, suburban sprawl is a fact we will have to live with for the forseeable future. Why not encourage suburban sustainablity by all available means, whether that be conserving water with a rain garden, to replacing lawn with productive plantings, to using solar garden lighting? And the techniques that work in the suburbs can be applied to urban living, also, with appropriate modifications. For example, the urban grower will have to rely more on the farmer's market, due to limited growing space, but he or she can still take advantage of techniques like home food preservation. All it takes is the desire and a little thoughtful consideration.
The biggest impact any of us can make on our carbon footprint is to use less energy. This means not just using less heat in the winter and air conditioning in the summer, or limiting the number of trips we make in the car. It means we must learn to think about how our actions affect energy use on a larger scale. One of the biggest sources of energy use in our daily lives is the production, shipping and marketing of food. Every pound of food you obtain close to home is a pound that did not have to be shipped, stored or processed. Therefore, the first two resolutions we recommend are:
1. I will eat more like a hunter-gatherer.
and
2. I will shop more like a hunter-gatherer.
Human beings have been hunter-gatherers for about 97 percent of our time on the planet. Our bodies are designed to utilize the nutrients obtained from consuming a wide variety of fruit and vegetable foods supplemented by relatively small amounts of meat. Even if you don't grow much yourself, keeping this principle in mind should lead you to the local farmer's market, and to local producers, instead of purchasing processed foods designed for a long shelf life. The "hunter-gatherer" approach should also encourage you to utilize in-season foods. January and February are tradtionally the most difficult months to grow food, but they are great times to enjoy last season's preserved produce, and to savor storage-friendly crops like winter squash, sweet potatoes, root vegetables and nuts.
For the carnivore, slow cooked dishes featuring grass-fed meats or wild game are always appropriate for winter meals. Modern techniques are bringing pastured, all-natural or organically produced meats to virtually every urban center. We are fortunate to have several producers in the Knoxville area.
Our third resolution is meant to encourage the inexperienced to start growing food:
3. I will grow at least one thing to eat this year.
Even if you begin only with a pot of parsley, I predict you cannot limit yourself to only one crop. Pick something you use frequently and that everyone in the household eats, and grow it. In a pot or in a plot, it doesn't matter. You'll get all the great benefits of gardening with minimal expense and effort, and the satisfaction you will feel will boost your confidence as a gardener. So take the plunge.
If you are a gardener with experience, you will like our fourth resolution:
4. I will grow food more efficiently by planning better, using non-traditional garden spaces, and better succession cropping.
The bane of every food gardener is the unwanted surplus. Refine your plans so you produce what you need without too much excess. Online planning tools can be a real aid to vegetable garden design. Investigate the possibilities. Also, make arrangements early in the season to donate excess produce so you will know what to do with food you end up not needing. FoodPantries.org lists places to donate by city. Here is the link to the list for Knoxville.
 And finally, remember that our planet is experiencing an extinction crisis, mostly brought on by human activities. Grow something this year that helps your local ecosystem, such as nectar plants or host plants for butterflies, or add some native wildflowers to your landscape design. That thought leads to our final resolution:
5. I will remember that I am part of the larger planetary ecosystem, and will act accordingly, as the responsible and intelligent creature that I am.
Here's hoping everyone has a great gardening year in 2013!
Win a Free Subscription to Tennessee Gardener!
Email me with your best garden tip for 2013 and win a free one-year subscription to Tennessee Gardener. All entries must be received by January 31, 2013. A total of 3 winners will be announced in early February.
Popularity of Urban Homesteading Increasing
Our numbers are growing. Every day, as I drive around the area, I see evidence of the popularity of homegrown food and backyard farming. Gardens appear where none were last year. Tomatoes line the front walk, where petunias once bloomed. Herbs spill from fourth story balcony rails. With the launch of our Sustainable Suburbs project in 2013, we hope to introduce more people to the techniques they need to live in a saner, greener, more sustainable way, without giving up the comforts of life in the suburbs. The way we see it, suburban sprawl is a fact we will have to live with for the forseeable future. Why not encourage suburban sustainablity by all available means, whether that be conserving water with a rain garden, to replacing lawn with productive plantings, to using solar garden lighting? And the techniques that work in the suburbs can be applied to urban living, also, with appropriate modifications. For example, the urban grower will have to rely more on the farmer's market, due to limited growing space, but he or she can still take advantage of techniques like home food preservation. All it takes is the desire and a little thoughtful consideration.
The biggest impact any of us can make on our carbon footprint is to use less energy. This means not just using less heat in the winter and air conditioning in the summer, or limiting the number of trips we make in the car. It means we must learn to think about how our actions affect energy use on a larger scale. One of the biggest sources of energy use in our daily lives is the production, shipping and marketing of food. Every pound of food you obtain close to home is a pound that did not have to be shipped, stored or processed. Therefore, the first two resolutions we recommend are:
1. I will eat more like a hunter-gatherer.
and
2. I will shop more like a hunter-gatherer.
Human beings have been hunter-gatherers for about 97 percent of our time on the planet. Our bodies are designed to utilize the nutrients obtained from consuming a wide variety of fruit and vegetable foods supplemented by relatively small amounts of meat. Even if you don't grow much yourself, keeping this principle in mind should lead you to the local farmer's market, and to local producers, instead of purchasing processed foods designed for a long shelf life. The "hunter-gatherer" approach should also encourage you to utilize in-season foods. January and February are tradtionally the most difficult months to grow food, but they are great times to enjoy last season's preserved produce, and to savor storage-friendly crops like winter squash, sweet potatoes, root vegetables and nuts.
For the carnivore, slow cooked dishes featuring grass-fed meats or wild game are always appropriate for winter meals. Modern techniques are bringing pastured, all-natural or organically produced meats to virtually every urban center. We are fortunate to have several producers in the Knoxville area.
Our third resolution is meant to encourage the inexperienced to start growing food:
3. I will grow at least one thing to eat this year.
Even if you begin only with a pot of parsley, I predict you cannot limit yourself to only one crop. Pick something you use frequently and that everyone in the household eats, and grow it. In a pot or in a plot, it doesn't matter. You'll get all the great benefits of gardening with minimal expense and effort, and the satisfaction you will feel will boost your confidence as a gardener. So take the plunge.
If you are a gardener with experience, you will like our fourth resolution:
4. I will grow food more efficiently by planning better, using non-traditional garden spaces, and better succession cropping.
The bane of every food gardener is the unwanted surplus. Refine your plans so you produce what you need without too much excess. Online planning tools can be a real aid to vegetable garden design. Investigate the possibilities. Also, make arrangements early in the season to donate excess produce so you will know what to do with food you end up not needing. FoodPantries.org lists places to donate by city. Here is the link to the list for Knoxville.
 And finally, remember that our planet is experiencing an extinction crisis, mostly brought on by human activities. Grow something this year that helps your local ecosystem, such as nectar plants or host plants for butterflies, or add some native wildflowers to your landscape design. That thought leads to our final resolution:
5. I will remember that I am part of the larger planetary ecosystem, and will act accordingly, as the responsible and intelligent creature that I am.
Here's hoping everyone has a great gardening year in 2013!
Saturday, December 1, 2012
Homemade Holiday Gifts
The gift-giving season is upon us yet again. We have jars of
jam and jellies, along with dried peppers and various other foodstuffs that we made last summer and fall. I like to create food baskets for gift giving. For packaging, I save the little wooden crates
that clementines are shipped in, and re-purpose them as holiday baskets. Lined
with tissue paper or even clean, dry pine needles, they can hold an array of
goodies. Don't forget to include a copy of The New American Homestead for your gardening friends.
If you grow herbs, any cook on your list will appreciate a bundle of fresh cut rosemary or other fresh herb tucked into the gift basket. Tour your yard for other possible decorations, such as pine cones, evergreen boughs or hollyberries, rather than purchasing artificial items.

Market Bean Soup
All the dehydrated ingredients are available in well-stocked groceries. Mine come from the bulk department at Three Rivers Market. Don’t have a kitchen scale? No problem. Just use the scales at the market. The plastic bags come from there, also, and at no additional charge. As long as the total weight of the beans is one pound, the recipe will work. The bean mixture is separated into parts one and two because the legumes in part two do not need soaking and have a tendency to break down after long cooking. Preparing the soup in two stages avoids this. Nevertheless, you can just mix all the legumes together if you prefer. It will taste great and no nutrients will be lost. By the same token, feel free to use different combinations of dried legumes. As long as the ones that need soaking get it, they will be tender when the soup is finished.
Here’s a tip for going greener: Instead of wasting a disposable canning lid, purchase plastic re-usable lids for Ball™ canning jars. They are great for storing unused home-canned products in the refrigerator, and are typically available wherever canning supplies are sold. They are dishwasher and microwave safe, but don’t try to use them for canning.
Part One
To Prepare for Gift-Giving:
If you grow herbs, any cook on your list will appreciate a bundle of fresh cut rosemary or other fresh herb tucked into the gift basket. Tour your yard for other possible decorations, such as pine cones, evergreen boughs or hollyberries, rather than purchasing artificial items.
Didn’t put up any canned goods this summer? Not to worry.
You can create delicious, Earth-friendly homemade products with store-bought
ingredients. Consider this recipe with pineapple and pecans, both in season in
the markets now.
Pineapple Upside Down
Cake Jam-
3 ¼ cups chopped fresh pineapple (from one whole pineapple, trimmed, or about 2 lbs)
- 3 oz pecan pieces
- 1 box pectin
- ½ teaspoon unsalted butter
- 1 pound cane sugar
- ½ pound light brown sugar
- 1 teaspoon vanilla extract
Here’s another recipe for a great homemade food gift:

All the dehydrated ingredients are available in well-stocked groceries. Mine come from the bulk department at Three Rivers Market. Don’t have a kitchen scale? No problem. Just use the scales at the market. The plastic bags come from there, also, and at no additional charge. As long as the total weight of the beans is one pound, the recipe will work. The bean mixture is separated into parts one and two because the legumes in part two do not need soaking and have a tendency to break down after long cooking. Preparing the soup in two stages avoids this. Nevertheless, you can just mix all the legumes together if you prefer. It will taste great and no nutrients will be lost. By the same token, feel free to use different combinations of dried legumes. As long as the ones that need soaking get it, they will be tender when the soup is finished.
Here’s a tip for going greener: Instead of wasting a disposable canning lid, purchase plastic re-usable lids for Ball™ canning jars. They are great for storing unused home-canned products in the refrigerator, and are typically available wherever canning supplies are sold. They are dishwasher and microwave safe, but don’t try to use them for canning.
Soup Preparation
Instructions
- 1 Ib mixed beans (See below.)
- seasoning mixture (See below.)
- 1/2 pound ham or kielbasa, chopped (optional)
- salt and pepper to taste
- Parmagiano-Reggiano cheese or croutons (optional)
- soy sauce (optional)
2. Drain. Place soaked
beans, Part Two of bean mixture, and three quarts water into a large pot. Bring to a boil and simmer 1 hour. Add seasoning mixture. Simmer 1 hour. Add ham or kielbasa, if used. Simmer 1 hour longer. Taste and adjust seasoning. Serve topped with cheese or croutons, or
both. Pass soy sauce at the table, if desired.
Bean Mixture: Part One
-
3 3/4 ounces dry white baby lima beans
- 2 1/2 ounces dry red kidney beans
- 1 1/2 ounces dry great northern beans
- 1 1/2 ounces dry black turtle beans
-
2 1/2 ounces dry green lentils
- 2 ounces dry green split peas
- 1 3/4 ounces dry red lentils
- 1/2 ounces dry yellow split peas
-
1/2 ounces sun dried tomatoes, in small bits
- 1/2 ounces dehydrated chopped celery
- 1/2 ounces dehydrated chopped carrot
- 1/2 ounces dehydrated onion flakes
- 1 tablespoons dried basil leaves, crumbled
- 1/2 teaspoons dehydrated Worcestershire sauce*
- 1/2 teaspoons dried lemon zest
- 1/2 teaspoons ground black pepper
- 1/4 teaspoons dehydrated minced garlic
To Prepare for Gift-Giving:
Combine the seasoning ingredients and place in a small
plastic bag secured with a twist tie. Place Part Two of the bean mixture in a
second plastic bag. Place Part One of the bean mixture in the bottom of a large
jar, stuff the plastic bags inside and cap. This will keep for months in a cool
dark place.
Friday, October 26, 2012
Indian Summer
Indian Summer has brought splendid foliage to the Valley, and we have been harvesting our best fall lettuce in years. Warm, sunny days and cool nights have given us all the salad we can eat. Bak choy is ready to harvest in the greenhouse, and broccoli is producing heads. Cauliflower remains iffy. We may or may not get a crop. I have made a note to start the cauliflower a bit later next year. The late summer weather raised the temperature in the greenhouse into the 80s, which may have adversely affected the plants.
We may get our first frost next week, however. This will slow down lettuce, as well as our other late crops, beets, broccoli, Brussels sprouts, cabbage, carrots, cilantro, dill, parsley, spinach and Swiss chard, but none of them are likely to be seriously damaged by the light frosts we can expect between now and Thanksgiving. That should be enough time for the crops to mature. The cooler temps may also induce the cauliflower to bloom. We will keep our fingers crossed. In any case, based on historical data, the first frost is arriving about ten days later than usual this year, following the fourth warmest summer in the lower 48 states since record keeping began in 1895. Does this mean we will have a milder winter than usual?

According to the Old Farmer’s Almanac the weather here in the Central South will be cooler and snowier than usual. The entire Southeast, they say, will be “wet and chilly.” Accuweather says essentially the same thing. Here’s the map they posted for the upcoming season. Long term weather prediction is an inexact science, to say the least. Last year, Accuweather made headlines for being wrong.
We will take the mild weather for as long as we can get it. Besides lettuce, we are also harvesting baby beet and spinach greens, and our first crop of arugula is ready to pick today. I will make a delicious fall salad with dinner tonight. Thinning will allow the beets and spinach room to grow, which both will continue to do despite cold weather, as will the carrots. Last winter, we had carrots and spinach all season long from fall sown seeds. We just left the plants in their beds and harvested them as needed.

Protected by the greenhouse, sweet bell peppers, long frying peppers and pimentos continue to yield heavily. Fortunately, peppers are easy to freeze for later use. Just stem, seed, and rinse them. Dry well and pack into freezer containers, label and freeze. That's it. I also can relish made out of the pimentos for making the best pimento cheese you've ever eaten. (The recipe is on our In the Kitchen page.) We have been particularly impressed with the quality of 'Ashe County Pimento', a pepper we obtained from Southern Exposure Seed Exchange to try this year. It produces uniform, deep red, thick walled fruits with a small seed core and almost no blemishes. They look like tomatoes near the top of the image at left, showing part of one day's harvest last week. I have already made all the relish we will use through the winter, but the shape and size makes these peppers ideal for stuffing, also. We will definitely grow this one again next year. Two plants have provided all we need, and they are compact growers into the bargain. All our peppers have done extremely well with protection in the greenhouse.
Winter Garden Tips
As a general rule, the shorter days and colder temperatures of winter greatly reduce plants’ demand for water. Unless you observe potential wilting, you can reduce irrigation in raised beds to about half what it was during the summer, or even less. Cold, soggy soil will damage roots and spoil crops like carrots, beets and turnips. When in doubt, hold off on the water.
Similarly, plants need far less fertilizer now, because growth rates are slow. This is the best time to use organic fertilizers such as cottonseed meal, greensand, and phosphate rock. Their slow breakdown releases soil nutrients in the constant, small amounts plants need at this time of year.
Ideas From “Garden Talk”
I had great fun last Saturday morning on “Garden Talk” with Dr. Sue Hamilton on WNOX 100.3 FM. Our guest was Nancy Schneider from Stanley’s Greenhouse. We had a great discussion about re-blooming azaleas, like the wonderful “Encore” series that blooms three times a year, and likes full sun. One idea that came out of that discussion was to incorporate blueberries into azalea plantings. The two shrubs are in the same family and like the same growing conditions: moist, well-drained, acidic soil in full sun. The autumn coloration of the blueberry foliage compliments the colors of the azalea blooms.
We had several callers with questions and comments covering a range of topics. I’ll be co-hosting “Garden Talk” again tomorrow (October 27th) morning, at 8:05 AM. Join us and call in with your questions.
Friday, September 21, 2012
Happy Autumn Equinox!

Tomorrow, September 22, is the Autumn Equinox, and the weather has mercifully cooled down a bit. The accompanying photo depicts one of our favorite native plants for this season, smooth aster (Aster laevis). This is a cultivated variety named ‘Bluebird.’ Besides adding color, it attracts butterflies and bees.
For the backyard gardener, this time of year can be as busy as spring. Besides cleaning up spent plants and dealing with late summer’s abundance, you must also focus attention on the cool weather crops appropriate for the Tennessee Valley's “second spring.” From now until around Thanksgiving, you should be able to produce many of the same crops you’d grow in February, March and April.
Fast-maturing peas can be planted now, and you can transplant broccoli, cabbage and their relatives. If you did not start your own plants, you can easily find them at garden centers. Nurseries have responded to the surge in home food gardening by offering an increasingly good selection of transplants for fall planting. I have previously mentioned that late summer is also a good time for planting carrots, beets, leeks and turnips. There is still time to get them in the ground.
Greens Crops
We received over five inches of rain earlier this week, and our first planting of lettuce responded with rapid growth. We are starting more lettuce seeds in small pots tomorrow.
Deer Tongue – This is a loosehead heirloom from Southern Exposure Seed Exchange. It did not do so well for uslast spring, so we are giving it a try as a fall crop.
Ashley – A frilly loosehead type with pink coloration on the leaves, it has performed well in the past as a fall and winter crop.
Lollo Rossa – A crinkly, deeply savoyed loosehead with dark red markings on the leaves, this one also has a delicious, succulent texture.
Spinach provides healthy greens all winter, so we will plant about 25 square feet of it. ‘Bloomsdale’ is the best variety we have tried, and is the one most widely grown in this area. You can pick individual leaves and keep harvesting one planting for months. Two other green crops to sow this week are arugula and corn salad. Both can be sown in succession every two weeks from now until the end of October. The Asian mustards, tatsoi and mizuna, offer additional options for fall planting, but we like to wait to plant them until the weather is really crisp, to minimize insect problems.
We will also sow chervil, which grows happily for us throughout the winter months, and here and there some cilantro seeds.
Preserving Summer Abundance
Besides all the garden chores, fall brings with it the need to preserve summer’s abundance. Many gardeners have piles of tomatoes, peppers and cucumbers at this time of year. Did you know that you can freeze tomato-based foods like salsa and gazpacho? In recipes where the vegetables are chopped, texture is less of an issue, so freezing is an option. Also, the acid from tomatoes and citrus juices helps to preserve the summer-fresh flavors for a mid-winter treat.
A food processor will facilitate making either of these recipes, but you can also chop everything by hand. These recipes also lend themselves to the use of heirloom tomatoes, which may not give good results when canned. I developed the gazpacho recipe by experiment, and it subsequently occurred to me that salsa would work, too. I use 2-cup rigid plastic containers with wide mouth screw tops for freezing both these products. Either recipe can be easily multiplied. If you don’t own a kitchen scale, use the equivalent volume measures for the gazpacho base. As long as the ratios are maintained, the flavor will be great.
Frozen Salsa
1 cup chopped white onion
1 quart cored and chopped firm ripe tomatoes
1 cup chopped green or red bell peppers
¼ cup chopped seeded hot peppers, more or less, depending upon desired heat level
2 cloves garlic, minced
½ cup loosely packed chopped cilantro leaves and tender stems
juice of two lemons or three limes
1½ teaspoons salt
Place the onion in a heatproof strainer in the sink and pour 2-3 cups of boiling water over it. This step prevents the onion from becoming too strong during storage.
Combine the onion with the other ingredients and mix well. Chill until cold. Fill freezer containers to the mark, seal, label and freeze. To use, thaw overnight in the refrigerator and serve with chips.
Freezer Gazpacho Base
8 ounces ripe tomatoes, seeded and chopped
4 ounces cucumber, seeded and chopped
2 ounces bell pepper, seeded and chopped
¾ ounce red onion, minced
¼ ounce garlic, minced
1 ounce fresh mixed herbs, minced (basil, chervil, chives, parsley, tarragon)
A few grinds of freshly ground black pepper.
¼ teaspoon coarse sea salt
½ teaspoon sweet paprika
1 tablespoon freshly squeezed lemon juice
2 tablespoons extra-virgin olive oil
Combine these ingredients in a large bowl and mix well. Chill until cold. Fill freezer containers to the mark, seal, label and freeze. To use, thaw overnight in the refrigerator. Combine the gazpacho base with enough tomato juice, chicken broth or a combination to achieve a consistency you like. Serve chilled, garnished with sour cream, croutons, and finely chopped fresh parsley.
Friday, September 14, 2012
Pepper Season Is Here!

The tomatoes, with the exception of our late planting of Marglobe, are starting to wind down. We will pull all the spent vines this weekend, having already replaced the Bush Big Boy plants with fall lettuces.
Peppers, however, are anything but tired, and seem intent on supplying us with more than we can use for weeks to come. We have several varieties that have given great results this season.
California Wonder
We have been growing this one for years. If we could grow only one pepper, it would be this one. Large, uniform fruits ripen to bright red and are perfect for stuffing, relish or any recipe calling for sweet peppers. From four plants we can pick half a dozen fruits every few days.
Long Sweet Pepper
This old-fashioned type of pepper is easy to grow, versatile in the kitchen and prolific. Two plants are yielding one or two fruits every day. This variety is not as sweet as a bell pepper, but it is more likely to give a good harvest under less than perfect conditions. Often called a “frying” pepper, it stands up well to either pan frying or roasting.
Fish Pepper
If you like heat, you always want to include a small hot pepper variety in the garden. This one, originally from Thailand, came from Southern Exposure Seed Exchange. The variegated foliage is decorative, and the fruits start out green-and-white striped, ripening through yellow to orange-red. They are quite hot and ideal for spicing up relish, for red pepper vinegar (see below) or for garnishing Thai or Southwestern dishes.
Ashe County Pimento
This one looks like a flattened bell pepper, with thick, deep red flesh when ripe. It is the ideal pickling pepper, and can be used at any stage of ripeness. We will grow this one again next year, just for making relish. Seed also came from Southern Exposure.
Cayenne
This is the standard, long, red, hot-as-hell pepper that is dried and ground to produce the familiar powdered heat. I find they dry perfectly spread out on a tray at room temperature. When they are leathery, transfer them to a jar and place a couple of silica gel packets in with them to prevent mold. They will keep for a year.
Here is a recipe for red pepper vinegar. It can be made with any variety of hot pepper you happen to have. When working with hot peppers, always take care not to get the juice in your eyes. Wear plastic gloves, or simply avoid touching your face until you have washed your hands with plenty of hot, soapy water.
This recipe can be easily multiplied if you have a bumper crop of hot peppers.
Red Pepper Vinegar
Weigh out four ounces of whole, unblemished hot peppers. Wash them and pat dry with a kitchen towel. Cut a small slit near the stem end of each pepper with a paring knife. This allows the liquid to enter the pepper and keeps them from floating in the jar. Place the peppers in a clean, sterilized, canning jar. In a saucepan, bring 1 cup of white vinegar and 1-½ teaspoons of pickling salt to a boil. Carefully pour the steaming-hot vinegar mixture over the peppers. Place a canning lid on the jar and allow to cool. Store in a cool, dark place for at least two weeks to extract the flavor. Refrigerate after opening.
Friday, September 7, 2012
Keep Your Garden Producing
We took last weekend off from writing in observance of Labor Day, but we spent a lot of time in the garden. Now is a great time to take steps to maximize your food production for fall and winter. Here are some tips to make your outdoor time pay off during the last weeks of summer.
Keep vegetables picked.
Beans, cucumbers, okra, peppers, squash and tomatoes will all bear better if you keep their fruits picked. (Yes, all these are fruits, botanically speaking.) Harvest beans when they are about the size of a pencil, and don’t let cucumbers get too fat. Pick okra when the pods are about three inches long, unless you are growing one of the varieties that remain tender when large. Pick peppers at whatever stage you prefer to use them, but don’t let ripe ones hang on the vines. Vine-ripened taste is why you grow tomatoes, but, again, don’t let mature ones remain on the vines. Besides impeding further production, overripe fruits attract insects and birds that will also damage unripened fruits.
Maintain vigilance for pests.
 |
| Bean leaf roller adult |
The heat and humidity this time of year favor rapid insect multiplication. One or two bugs can turn into a horde overnight. Our late plantings of brassicas have been visited by both cabbage butterflies (Pieris rapae) and bean leaf rollers (Urbanus proteus). The latter also attacks brassicas, and metamorphoses into an attractive adult skipper that flits above our buddleia bushes, providing a good example of gardening yin and yang. See the photo at left. I enjoy the butterflies, but not their caterpillars. We killed 17 caterpillars in one bed and 47 in another one, despite weekly dustings with Bt. So far, we have kept the damage to a minimum, but all the transplants show at least a hole or two from munchers. The next sowing, around the middle of September, should produce plants that will go into the ground after cooler temperatures have solved the insect problem.
Another insect that can be controlled by hand is the ubiquitous squash bug (Anasa tristis). Its clusters of reddish-brown eggs [image] can be found on the undersides of the leaves of squash, pumpkins, melons and cucumbers. Larval squash bugs feed on the leaves and immature fruits of these crops. Adults [image] have sucking mouthparts and can do serious damage to squash, tomatoes and peppers by transmitting rot fungi. Squash bugs are prolific and require multiple control methods. Using a screen house to exclude them is one possibility. A simpler technique involves checking the leaves of the plants every few days and destroying any eggs you find. Sprays containing neem oil are moderately effective in repelling squash bugs.
Heat-stressed plants may attract tomato hornworms, or you may be growing moonflower vine (Ipomoea alba), night-scented tobacco (Nicotiana sylvestris, N. alata) or similar evening scented white blooms. All these attract sphinx moths (Sphingidae), the adults of hornworms. The caterpillars can devastate a tomato plant in short order, and grow to the size of your thumb or larger. Inspect your plants and pick off the smaller caterpillars before they do extensive damage.
 |
| Squash bug eggs |
 |
| Squash bug |
Renovate planting beds.
Remove spent plantings and add soil amendments, such as compost or peat moss, to your growing beds. If you are going to use them for a fall or winter green crop, add nitrogen in the form of cottonseed or blood meal. Bone meal or a small amount of wood ashes should be added to beds intended for cool weather root crops, such as carrots, beets or turnips. Too much nitrogen reduces yields in these crops, making them good candidates to follow nitrogen-hungry vegetables such as corn, spinach or brassicas.
For beds that will not be used again until spring, this is the ideal time to add wood ashes or lime along with organic amendments like shredded autumn leaves or pine needles. After the winter freeze, these materials will break down, improving the soil’s structure, moisture holding capacity and fertility.
If the soil in a vacant bed is in good shape, plant a cover crop to be tilled in next spring. Fast growing cool season annuals like alfalfa and annual ryegrass are potential choices.
Preserve your harvest
The seasonal abundance in your backyard and at the farmer’s market creates plenty of opportunities to preserve food for the coming months. Freezing is the simplest way to preserve foods such as beans, okra, carrots and peppers. Softer foods, like tomatoes, retain their texture best if canned, although they can be frozen for soups and sauces.
Trim green beans and carrots to the size you want them. These vegetables should be blanched three minutes in boiling water, then drained and refreshed in ice water before being packed into freezer containers.
Wipe okra pods with a dry kitchen towel and drop into freezer bags or boxes. If you want the okra sliced, do this after thawing. Peppers should be stemmed, seeded and cut into the size you desire. Spread them out on waxed paper on a cookie sheet and freeze overnight. Then transfer the frozen peppers to freezer containers.
Information on home canning can be found in lots of places. Make sure you follow instructions precisely to insure food safety. The best foods to can for beginners are tomatoes, tomato juice, peaches, and various pickles and relishes. These acid foods naturally resist bacterial spoilage.
Jams, jellies, preserves and conserves all employ sugar to preserve the food. They can be sweet, like strawberry jam, or savory, like chutneys and herb jellies.
Herb Jelly
Prepare an extract of herb leaves by placing one cup (packed) herb leaves in a large heatproof bowl. Cover with 1 cup of boiling water and allow to steep for 10 minutes. Strain. For each cup of apple juice called for in your favorite apple jelly recipe, add two tablespoons of the herb extract. Then proceed with the recipe as directed. This works especially well with “sweet” herbs such as basil, lemon verbena and rosemary. You can adjust the amount of herb flavor to taste.
Check out our In The Kitchen page for an easy and delicious dill pickle recipe.
Friday, June 22, 2012
Elderberries Bloom
 Elderberries are blooming in the Tennessee Valley region, and will continue, depending upon elevation, until the end of July or thereabouts. Growing often in waste places, fence rows and disturbed areas, frequently on poor soil, the eastern North American species of elderberry, Sambucus canadensis, has been consumed by humans since prehistoric times. Both the flowers and the fruits are edible, but the leaves and other plant parts should not be consumed. In Europe, flowers from the related species Sambucus niger, is used to make elderflower syrup, a flavoring for beverages. When I came upon a healthy stand of elderberries while driving in the mountains last week, I decided to try my hand at making elderflower syrup from the local flowers.
In case you decide to follow in my footsteps, I offer two cautionary notes. 1) Be absolutely certain of your identification. The image above should give you an idea of what the plant looks like. It is a shrub about four feet tall or more when in bloom. 2) Do not collect flowers from plants growing along well-traveled roads. The plant in the image is within 100 yards of Interstate 75, and will be heavily contaminated with dust and pollutants from the highway. Find your plants on a country back road, or better yet, while hiking in the National Forest. It is permissible to collect elderberry flowers and fruits in the national forest. Don't try it in a state or national park, however. You can see from the image that the flower umbel is born on a long stalk. I cut off the flower stalk just about the pair of leaves with my pocketknife. In less than five minutes, I had a paper shopping bag full of blooms.
Upon arriving home, I washed the blooms by holding the stem and swishing the flowers in a sink full of cold water. This must be done carefully, as insects are fond of elderberry nectar. After rinsing, pat the flowers dry with a kitchen towel. To prepare the syrup, proceed as follows:
1. Grasp the flowers with your fingers and pull them free. If a bit of stem remains attached to each flower, no worries. You should, however, discard all the larger green stems.
2. Weigh the prepared flowers on a kitchen scale. This recipe is for 4 to 5 ounces of flowers. (If you don't have a scale, use about three cups, loosely packed, of the prepared flowers.)
3. In a large pot combine 6 cups of sugar with 4 cups of cold water. Place the pot over medium heat and bring to a simmer, stirring occasionally, until the sugar is completely dissolved. Allow to come to a full boil, the remove from the heat, cover and let stand 10 minutes to cool a bit.
4. Add the elderberry flowers and stir to submerge them. Cover, and leave at room temperature overnight.
5. The next day, remove the zest from 5 large lemons, using a bar zester or vegetable peeler. Avoid getting any of the white pith. Juice the lemons, strain the juice, and add it and the zest to the pot with the elderberry flowers. Replace the cover, place in the refrigerator, and let stand for three more days.
6. On the fourth day, strain the syrup into sterilized bottles and store in a cool, dark place.
(To sterilize bottles, wash in warm, soapy water, rinse until no trace of soap remains. Drain thoroughly. Add a tablespoon of pure grain alcohol to each bottle and shake well before adding the syrup. The alcohol also helps to preserve the syrup. If you don't want to use alcohol, place the washed bottles in a preheated 350 degree oven for 10 minutes. Remove and allow to cool before filling. CAUTION: if the bottles are too hot when filled with cold syrup, they will shatter!)
To use the syrup, place about two tablespoons (or to taste) in a glass and add club soda and ice. Stir. Enjoy.
Cultivated varieties of elderberries are widely available and make fine garden subjects. I think it is more fun to forage for wild elderberries, however. Later in the season, I will go looking for the ripened berries. If I get them before the birds do, I plan to make some elderberry wine. Stay tuned.
Subscribe to:
Posts (Atom)